current document describes how to install a high-availability Apollo cluster with one click through the cloud-native application management platform Rainbond.This method is suitable for users who are not familiar with complex technologies such as Kubernetes and containerization, and lowers the threshold for deploying Apollo in Kubernetes.
1. Background information
1.1 The combination of Rainbond and Apollo
Rainbond is an easy-to-use open source cloud-native application management platform.
With it, users can complete the deployment and operation and maintenance of microservices in a graphical interface.
With the help of the capabilities of Kubernetes and containerization technology, automatic operation and maintenance capabilities such as fault self-healing and elastic scaling can be empowered to users' businesses.
Rainbond has a built-in native Service Mesh microservice framework, and also has a good integration experience with other microservice frameworks such as Spring Cloud and Dubbo.
Therefore, a large number of Rainbond users may also be users of the Apollo distributed configuration management center.
Such users no longer need to care about how to deploy the Apollo cluster. The Rainbond team made Apollo an application template that can be deployed with one click, which is free for open source users to download and install.
This installation method greatly reduces the deployment burden of users using the Apollo cluster, and currently supports version 1.9.2.
In the current installation method, a set of PRO environment is integrated by default, and other environments are added. See the Advanced Features section later.
1.2 About application templates
The application template is an installation package for the Rainbond cloud-native application management platform. Based on it, users can install business systems into their own Rainbond with one click.No matter how complex the business system is, the application template will abstract it into an application, and install it together with the images, configuration information of all components in the application, and the relationship between all components.
2. Preconditions
The deployed Rainbond cloud-native application management platform:such as Quick Experience Versioncan run in a personal PC environment at the cost of starting a container.
Can connect to the Internet.
3. Quick start
3.1 Access the built-in open source app store
Select the app market tab on the left, switch to the open source app store tab on the page, and search for the keywords apollo to find the Apollo app.

3.2 One-click installation
Click to install on the right side of Apollo to enter the installation page. After filling in the simple information, click to confirm to start the installation. The page automatically jumps to the topology view.
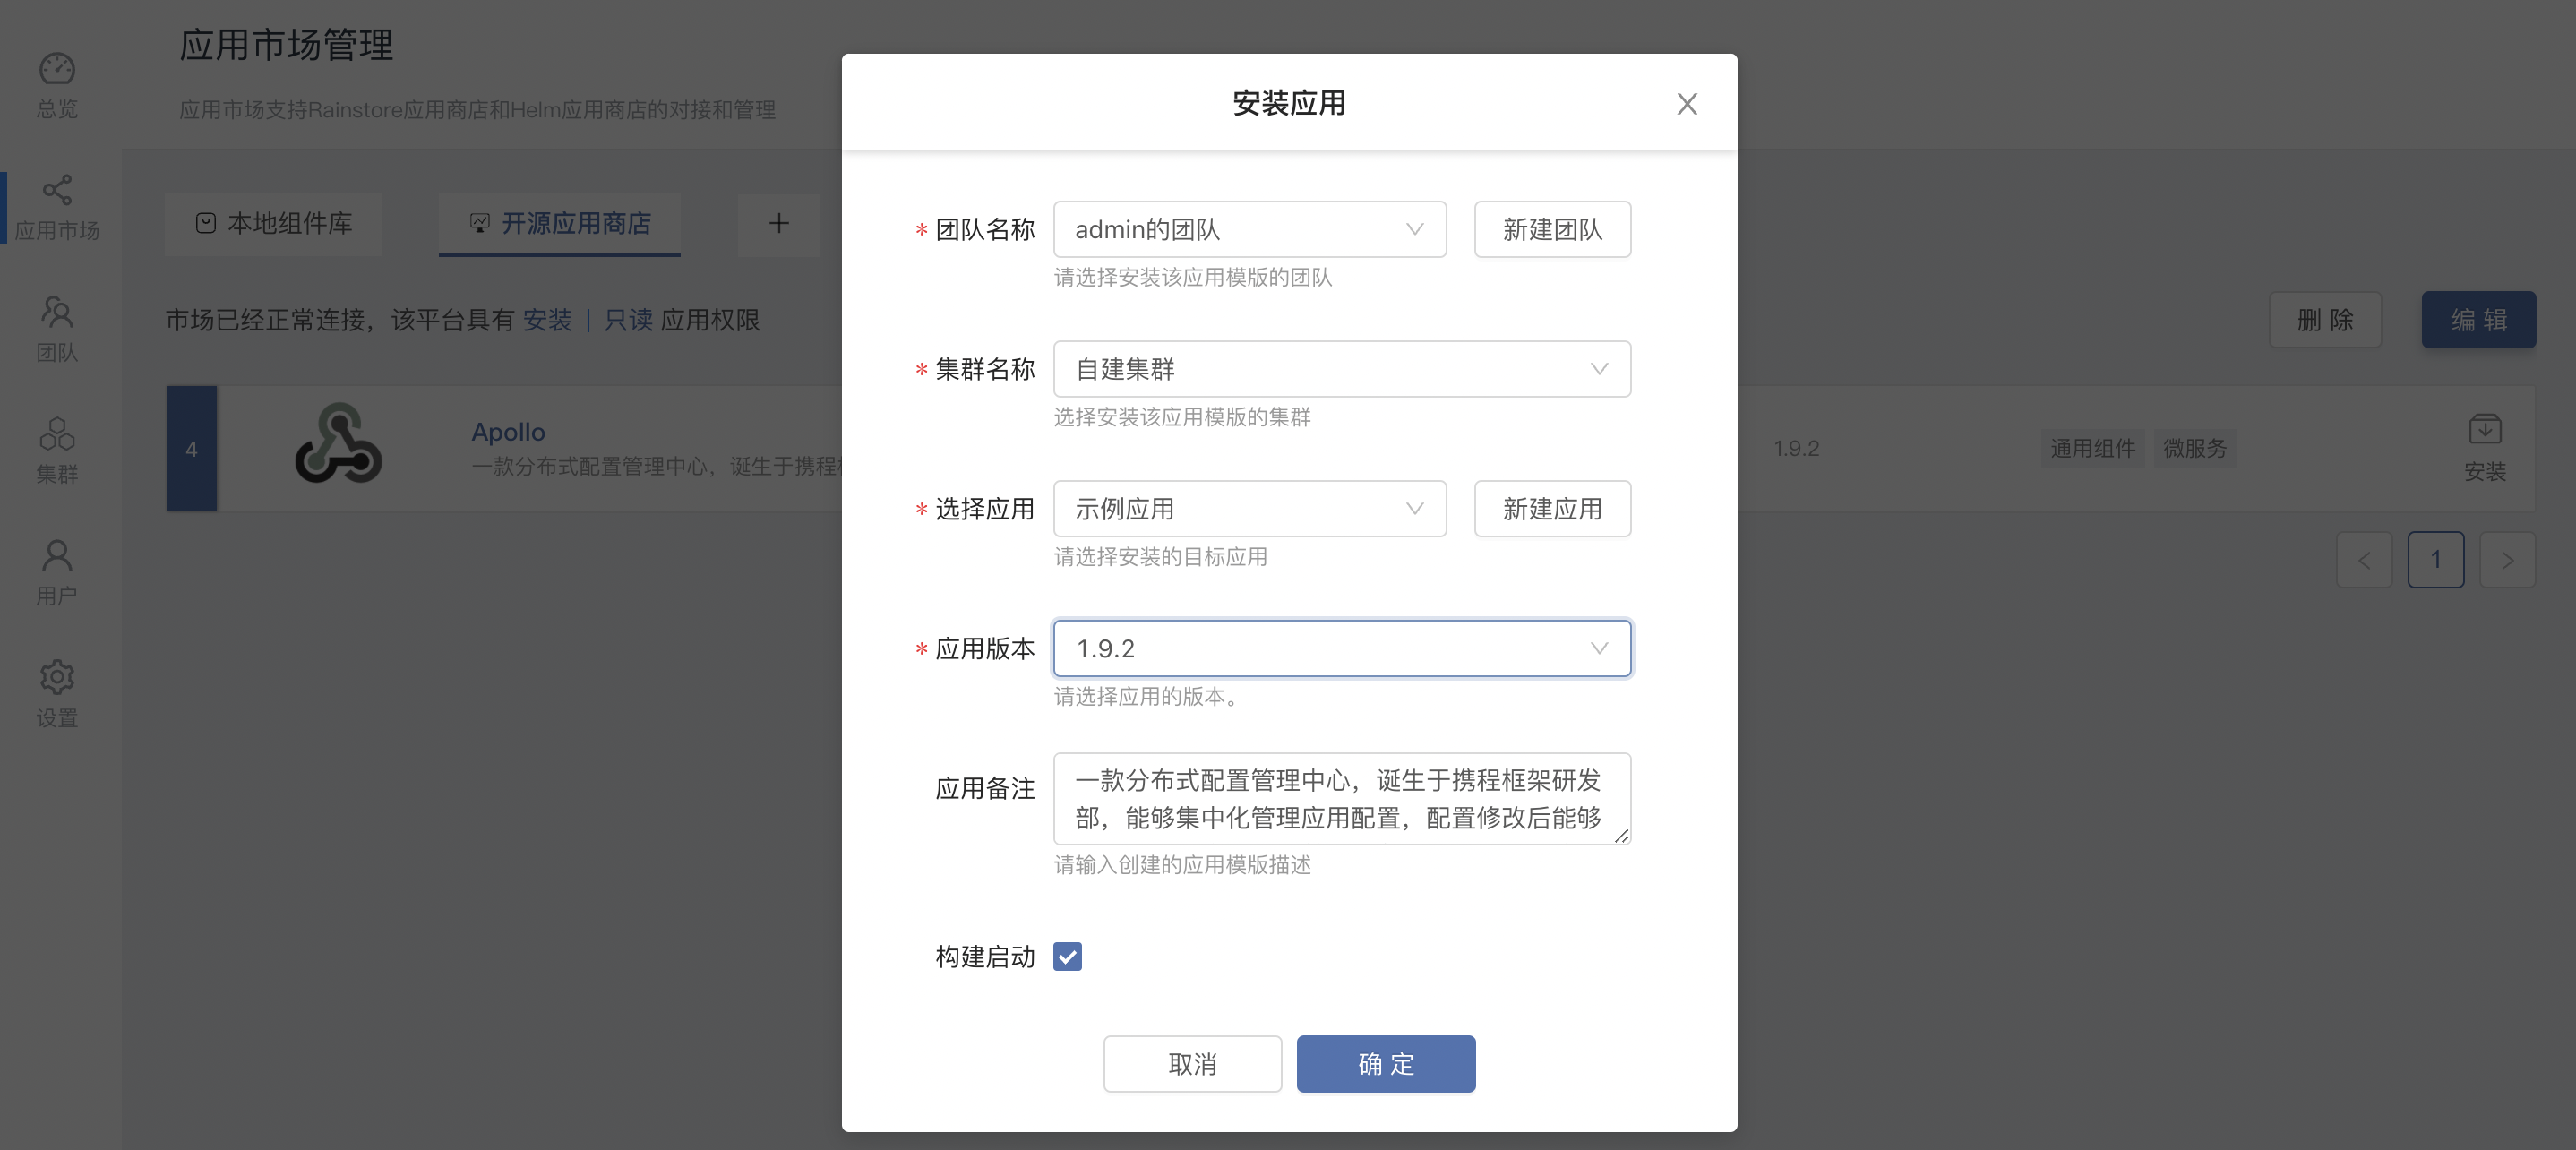
parameter description:
| options | illustrate |
|---|---|
| Team Name | User-created workspace, isolated by namespace |
| cluster name | Choose which K8s cluster Apollo is deployed to |
| Choose an application | Choose which application Apollo is deployed to, the application contains several related components |
| App version | Select the version of Apollo, the current optional version is 1.9.2 |
After a few minutes, the Apollo cluster will be installed and running.
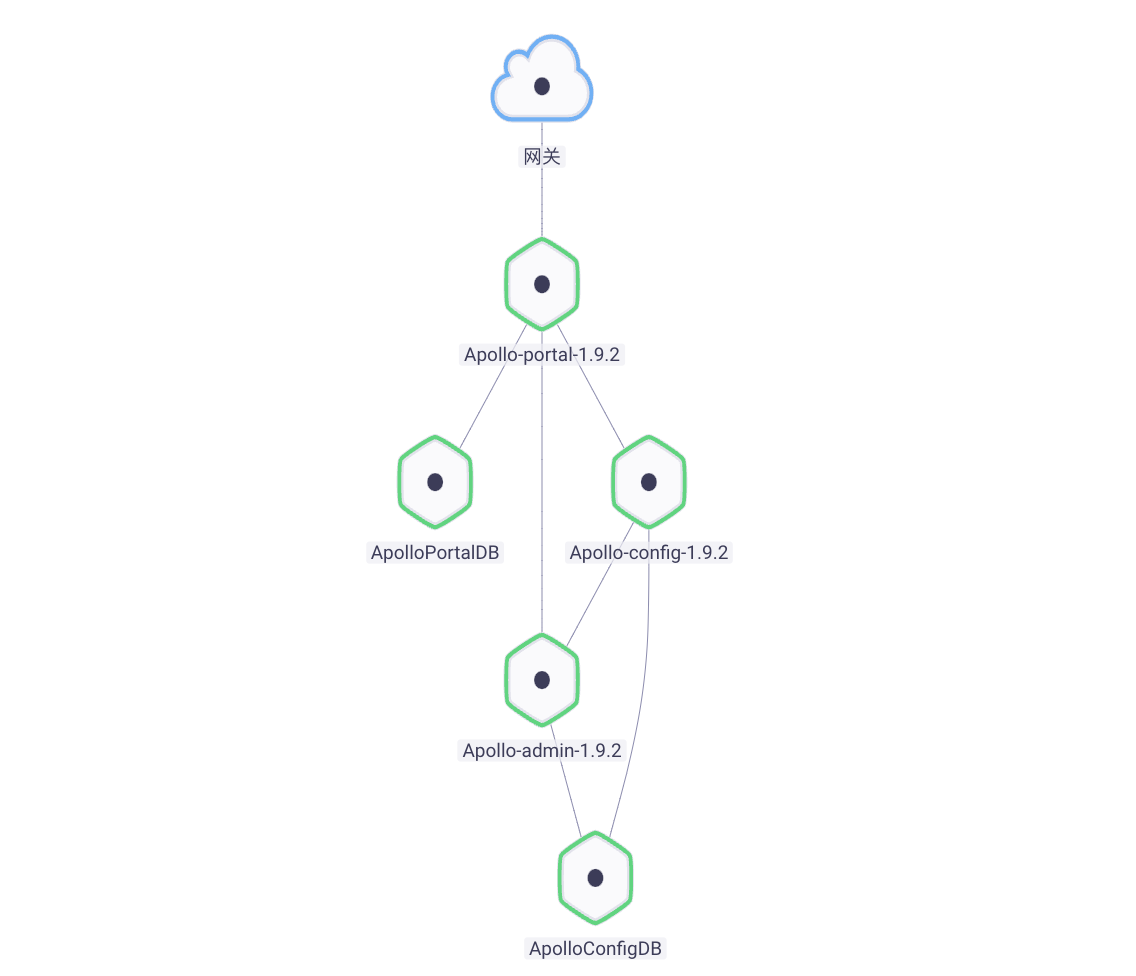
3.3 Testing
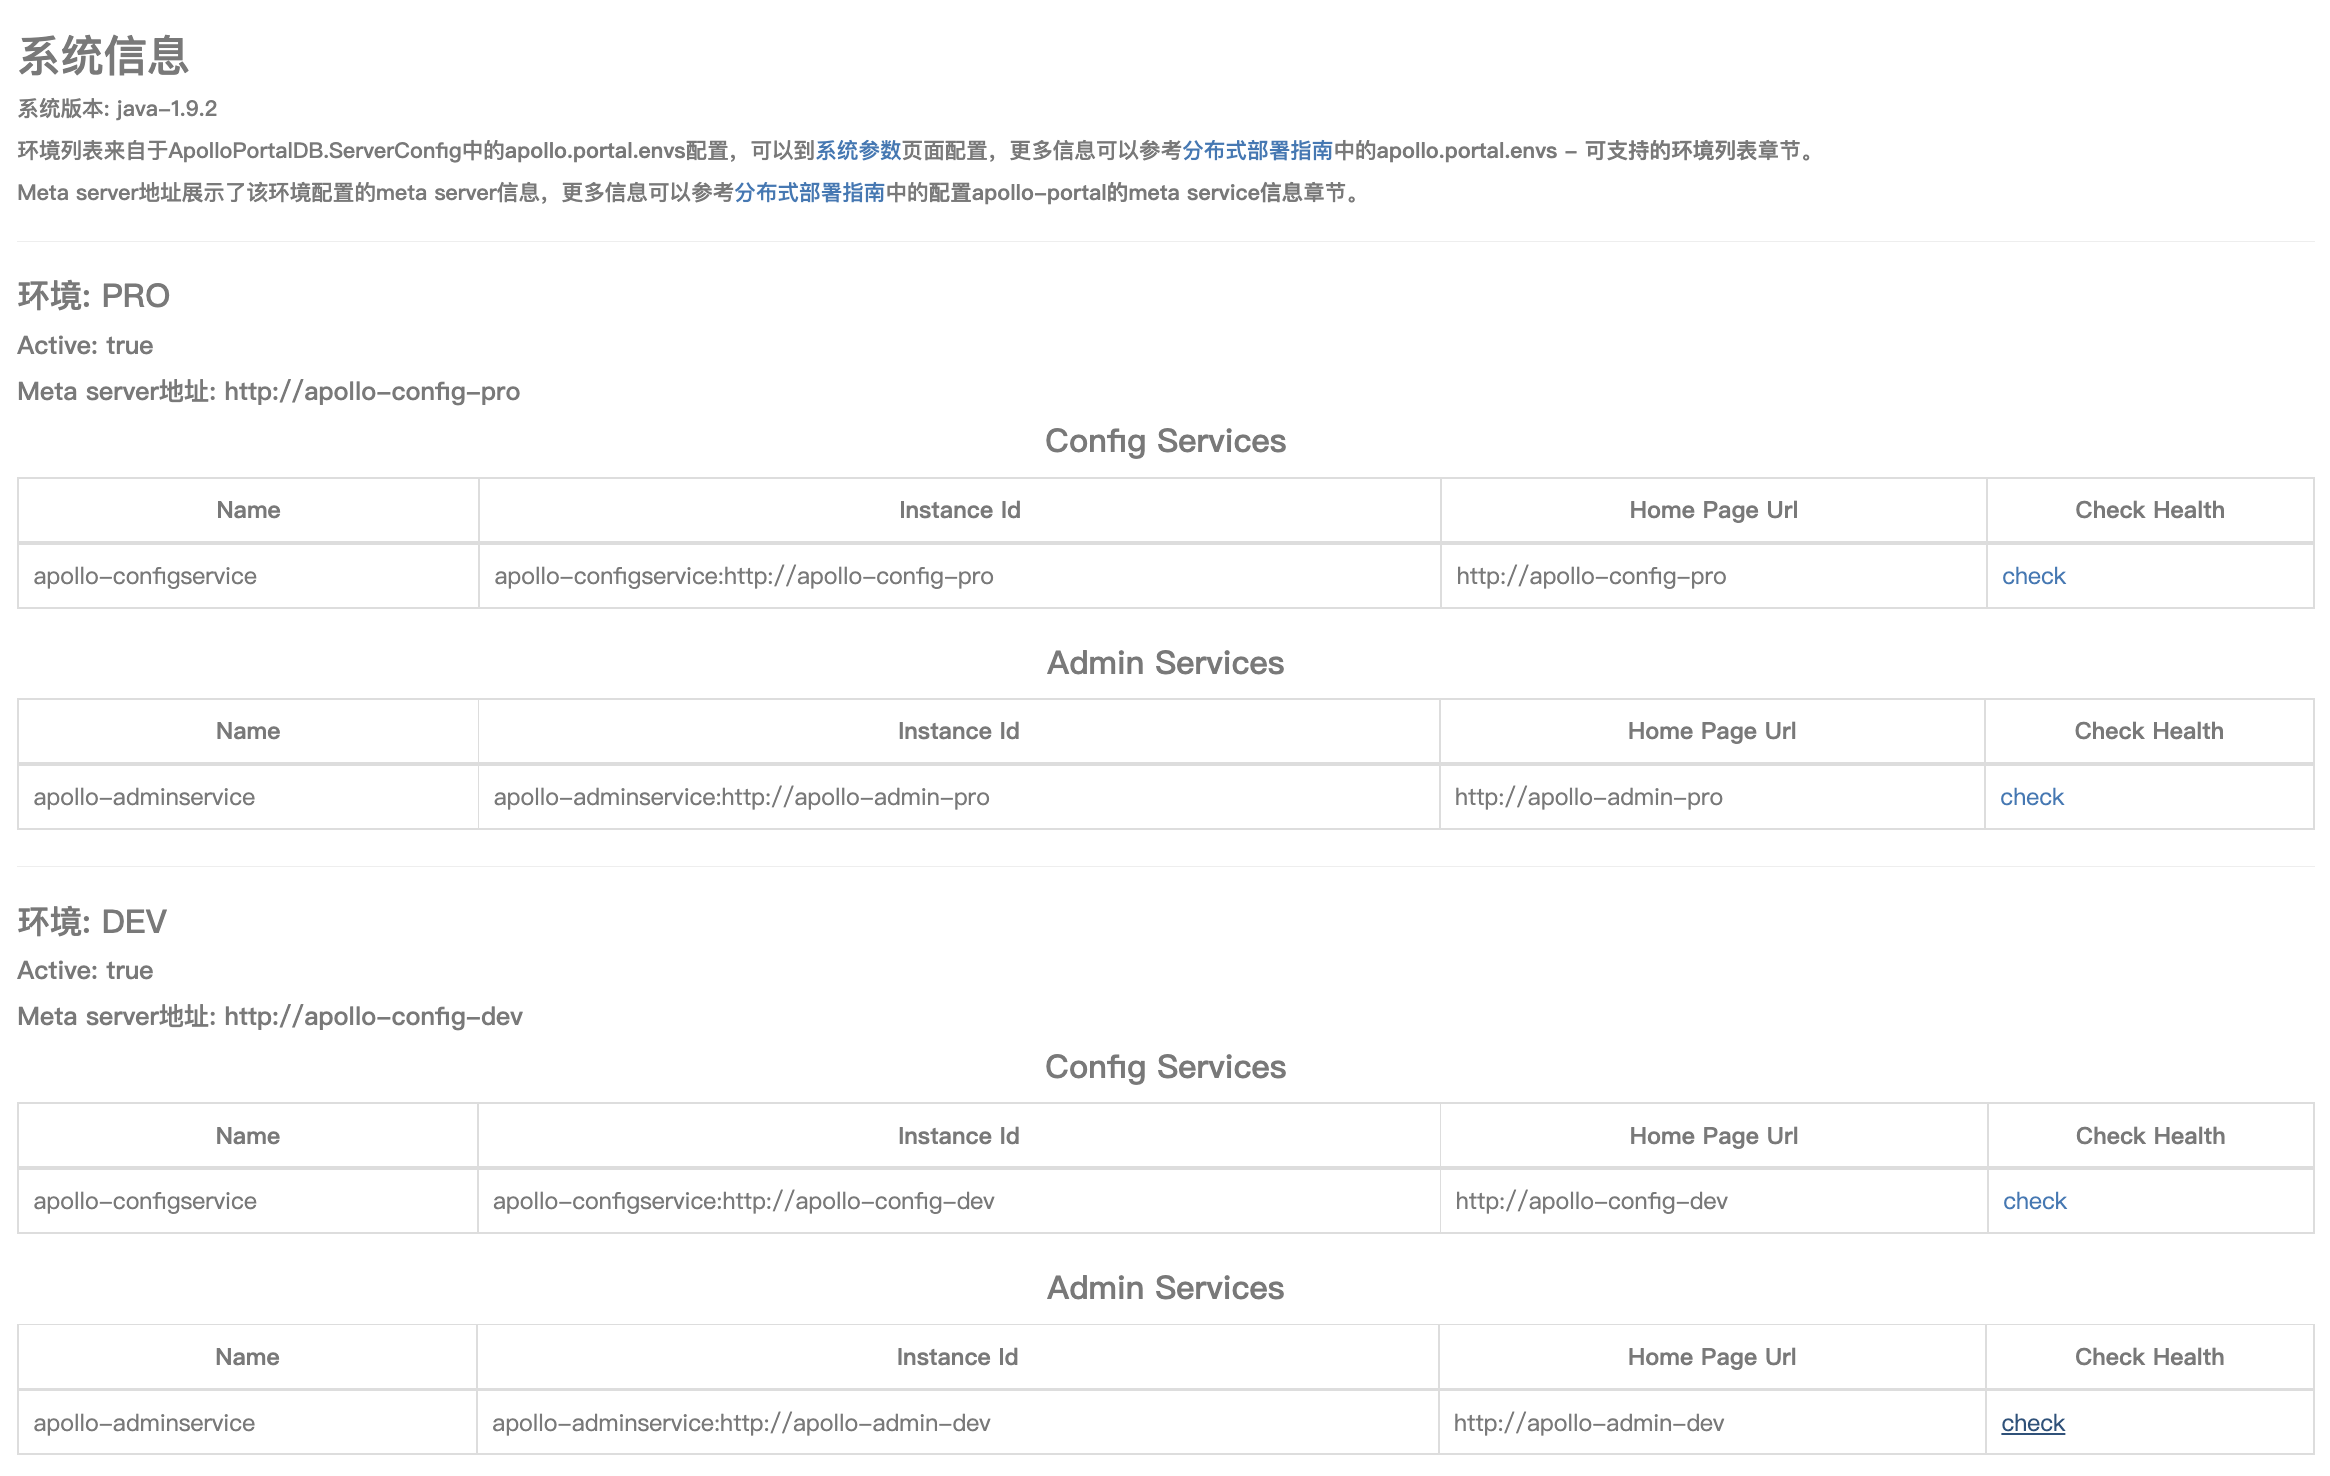
Access the default domain name provided by component Apollo-portal-1.9.2 , you can log in to the Apollo console, and in the system information, verify that the PRO environment is ready.
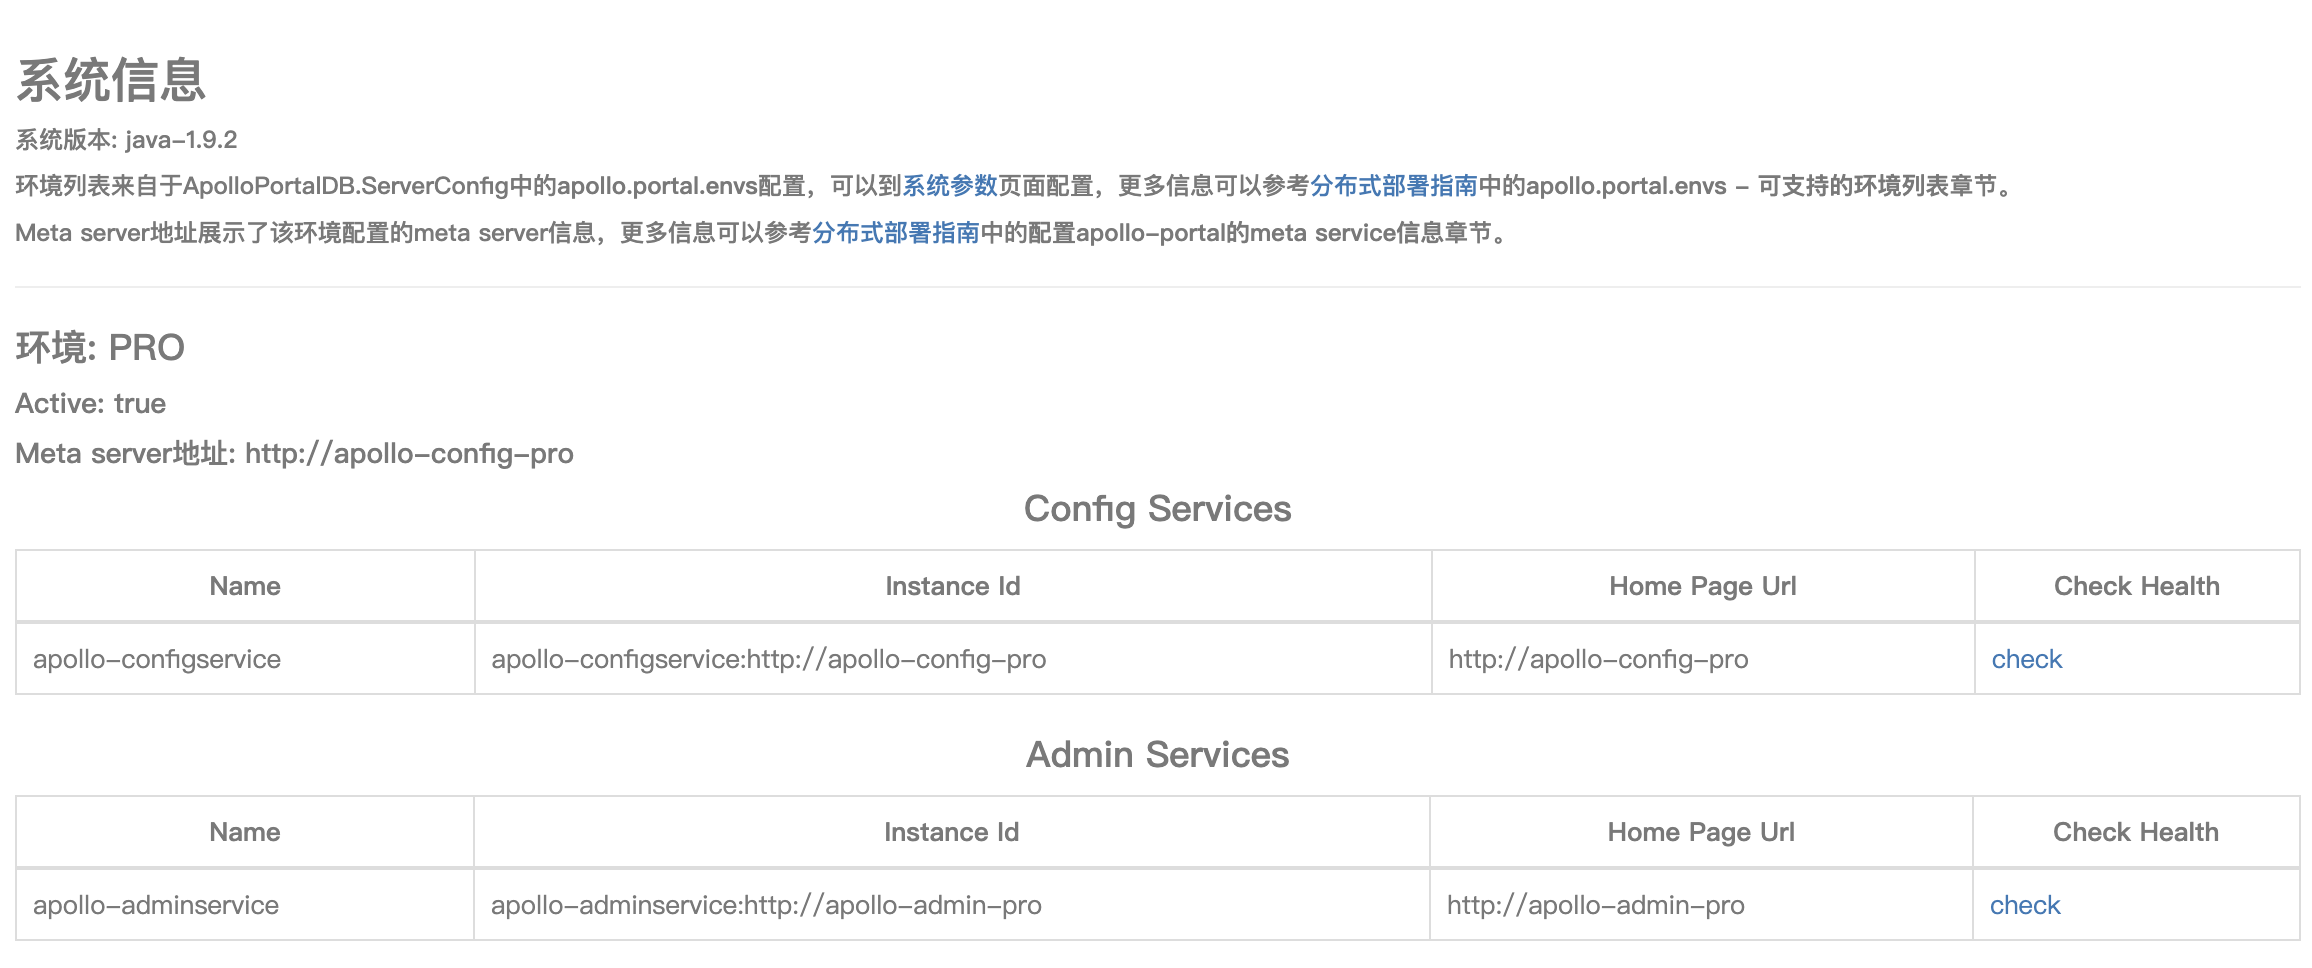
3.4 Configuration
In Rainbond, Apollo clusters can be configured based on a graphical interface.It mainly includes three aspects: environment variables, configuration file mounting, and plug-in configuration.
Environment variables:Through the environment configuration in different component pages, environment variables can be customized.For example, for
Apollo-portal-1.9.2,APOLLO_PORTAL_ENVS=prois added by default to define the current portal managed environment.Profile:Configuration files can be set for components by setting the environment configuration in different component pages.
Apollo-portal-1.9.2Mount/apollo-portal/config/apollo-env.propertiesMeta addresses used to define different environments.Apollo-config-1.9.2Mount/apollo-configservice/config/application-github.propertiesUsed to declare the service address of the current environment config and admin.
Plug-in configuration:defines the downstream call address in Rainbond by installing the export network governance plug-in for
Apollo-portal-1.9.2Apollo-config-1.9.2, which is an implementation of Service Mesh microservice governance.Access the specified port of the downstream service by defining the domain name of the downstream service.For example, in the plug-in ofApollo-portal-1.9.2, the domain name for accessingApollo-config-1.9.28080 port isapollo-config-pro, which is only the domain name defined in the configuration, and does not need to be defined the reason for the port.
4. Advanced Features
4.1 Scaling the number of instances
Apollo-portal-1.9.2 Apollo-config-1.9.2 Apollo-admin-1.9.2 components included in the Apollo Configuration Center are deployed using the Deployment controller, through the Rainbond built-in Service Mesh microservice framework Implement service discovery and communication.Therefore, these three components can expand multiple instances with one click to realize cluster deployment.
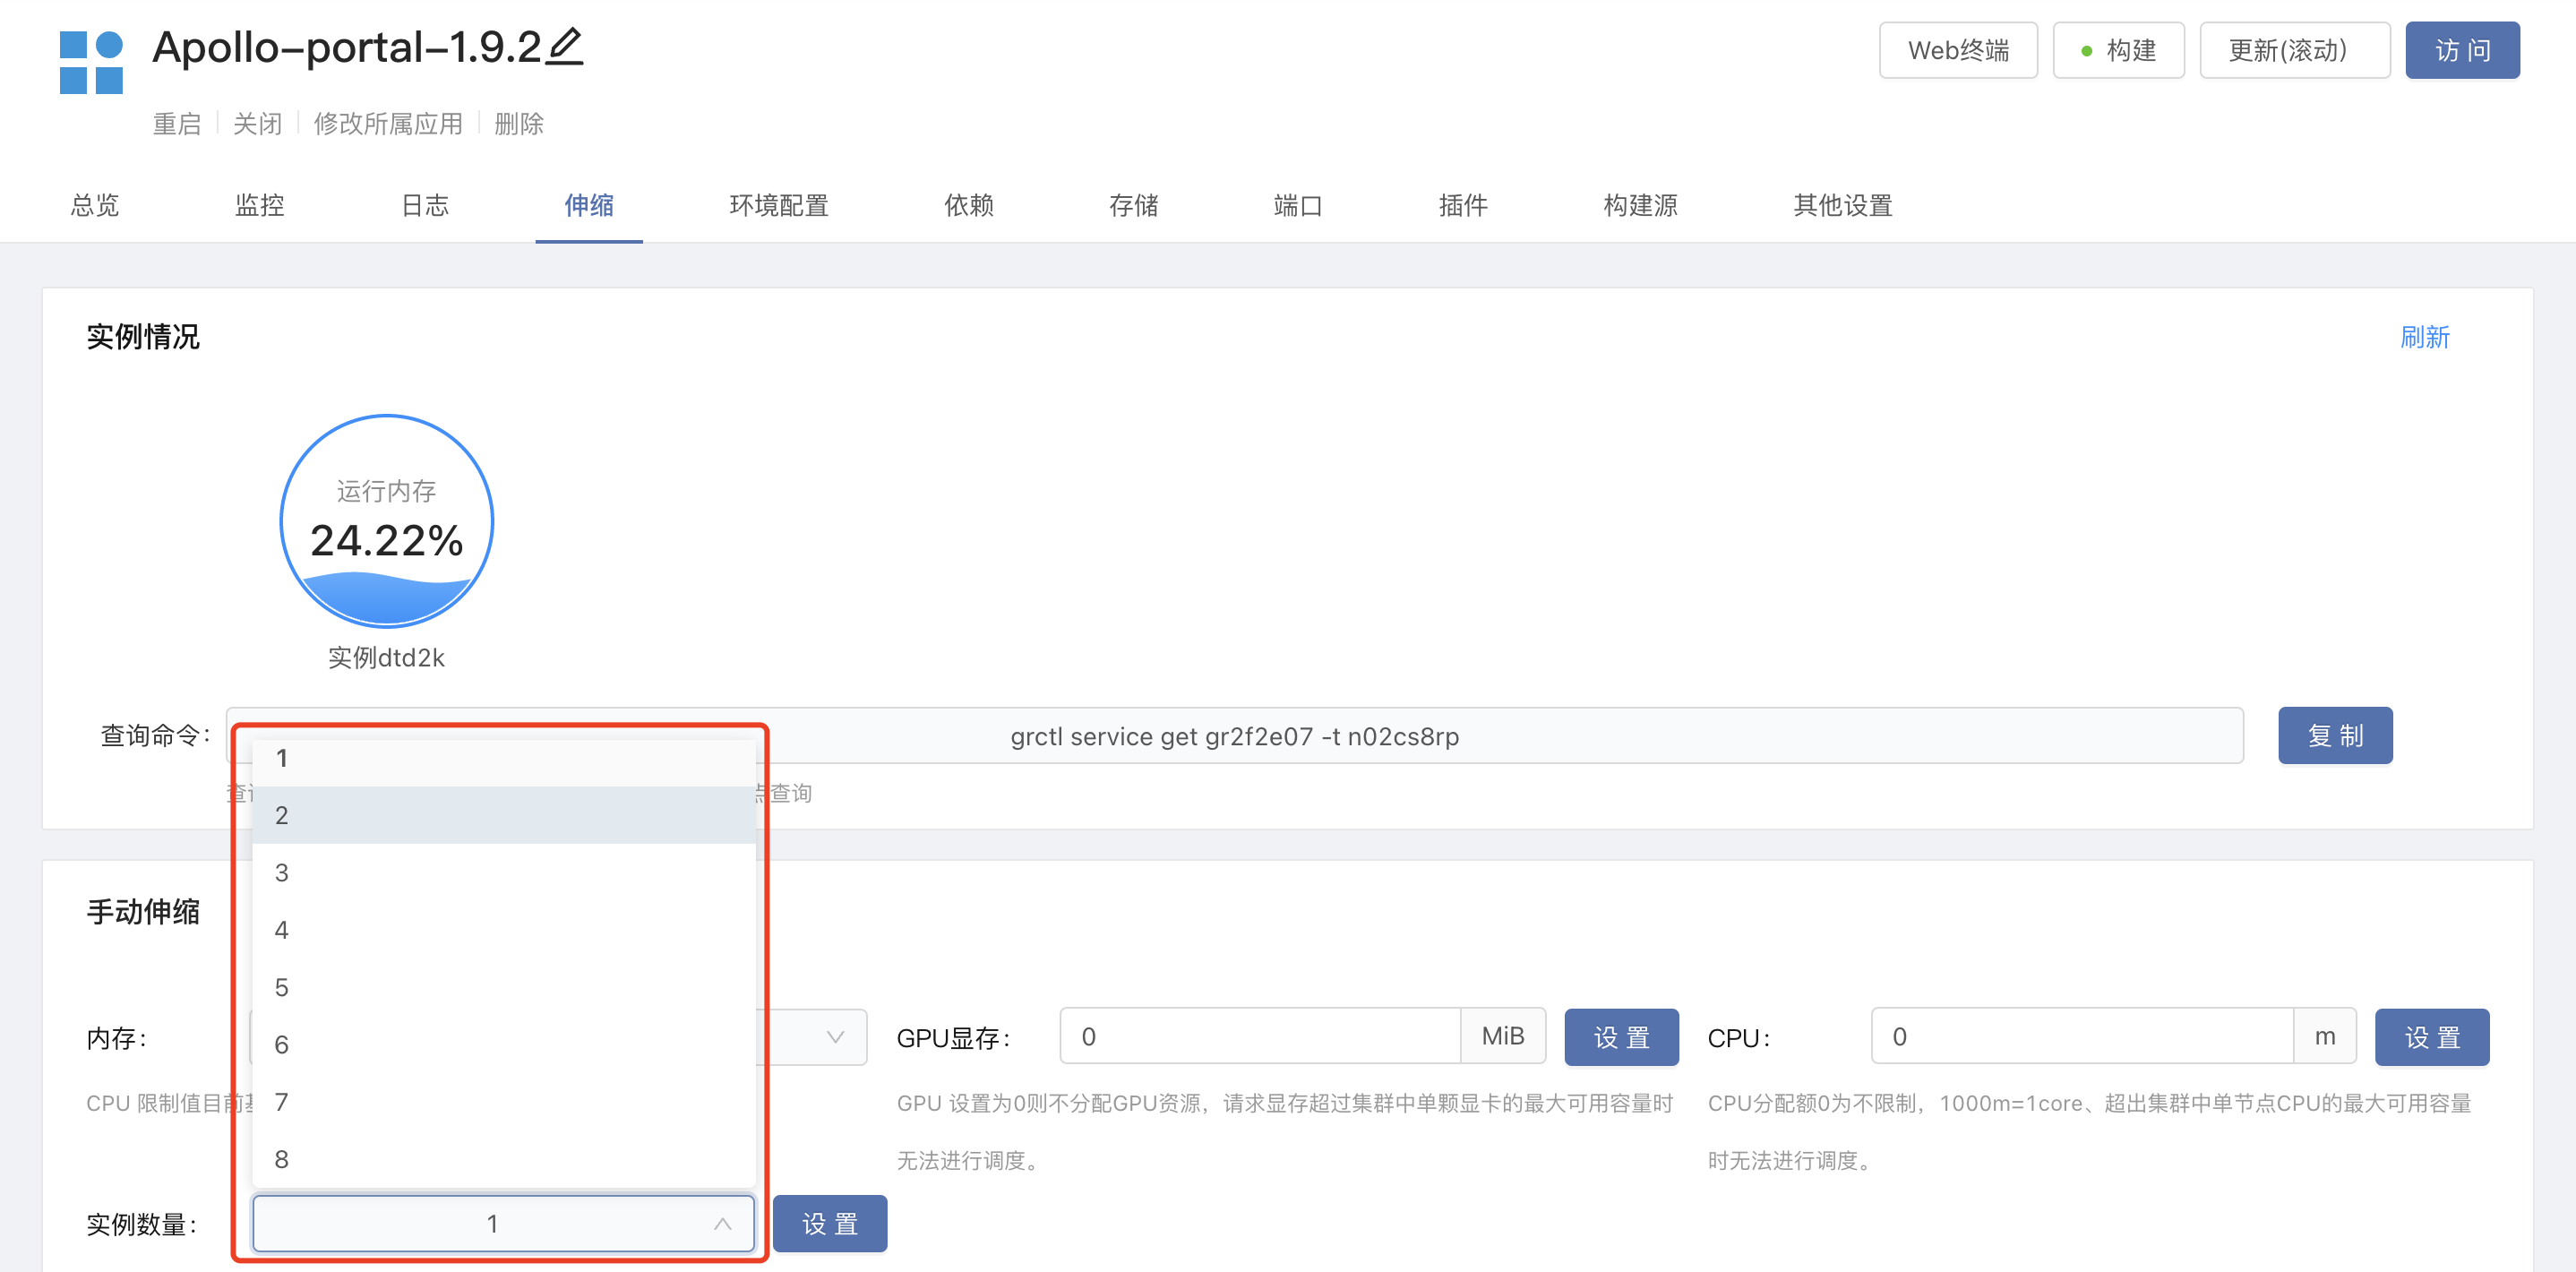
Take Apollo-portal-1.9.2 as an example, click to scale , after modifying the number of instances to , click to set.
4.2 Additional environment
Apollo Configuration Center supports docking with multiple environments and uses a unified Portal page for management.The Apollo cluster based on Rainbond one-click installation comes with PRO environment by default.Next, I will explain how to add a set of DEV environment in the Rainbond scenario, assuming that in the DEV environment, access Apollo-config-Dev through <code>apollo-config-devandapollo-admin-devrespectively Apollo-admin-Dev components.
- Deploy another set of Apollo clusters and remove
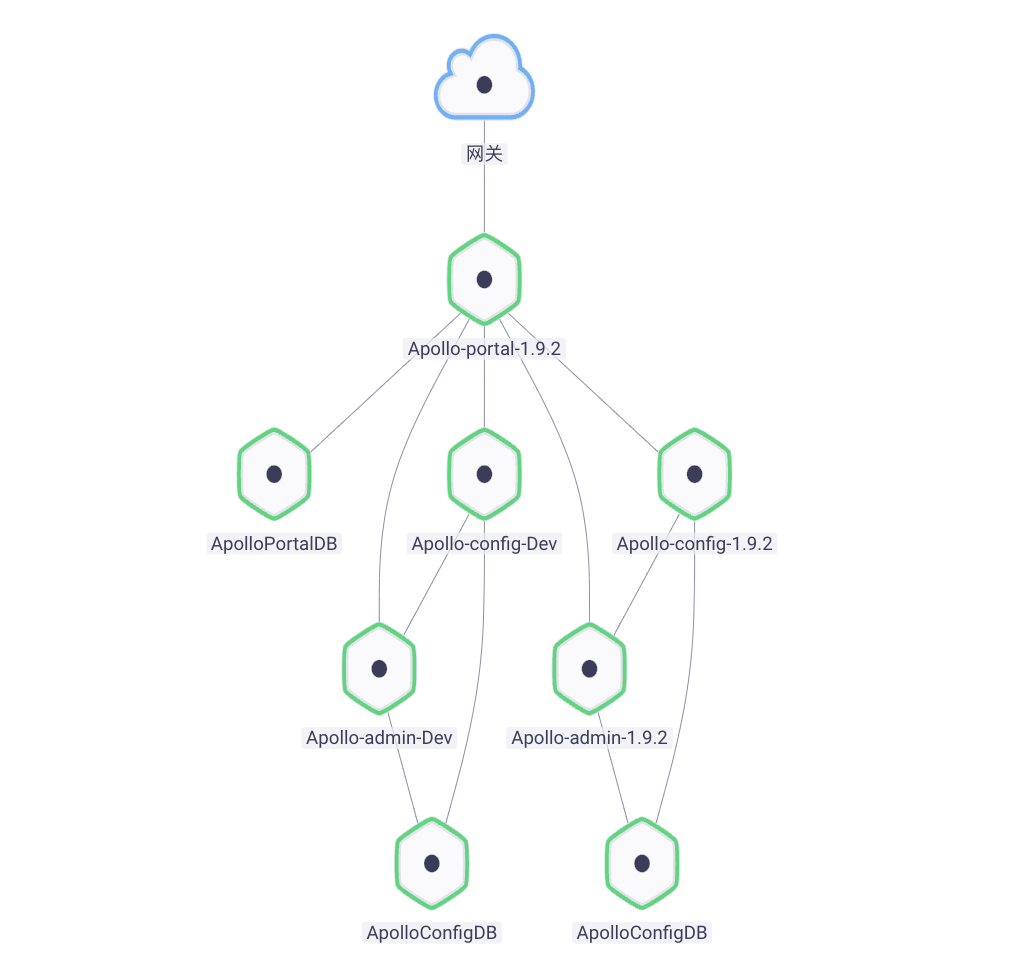
Apollo-portal-1.9.2ApolloPortalDBcomponents in the new cluster.To facilitate management, modify the name of theApollo-config-1.9.2Apollo-admin-1.9.2component.AddApollo-portal-1.9.2toApollo-config-DevApollo-admin-Devdependencies.The topology is shown as follows:
Note that this step will trigger the conflict of connection information environment variables, remember to redefine the name you like for the internal port of the
Apollo-config-DevApollo-admin-Devcomponent.
- On the environment configuration page, modify
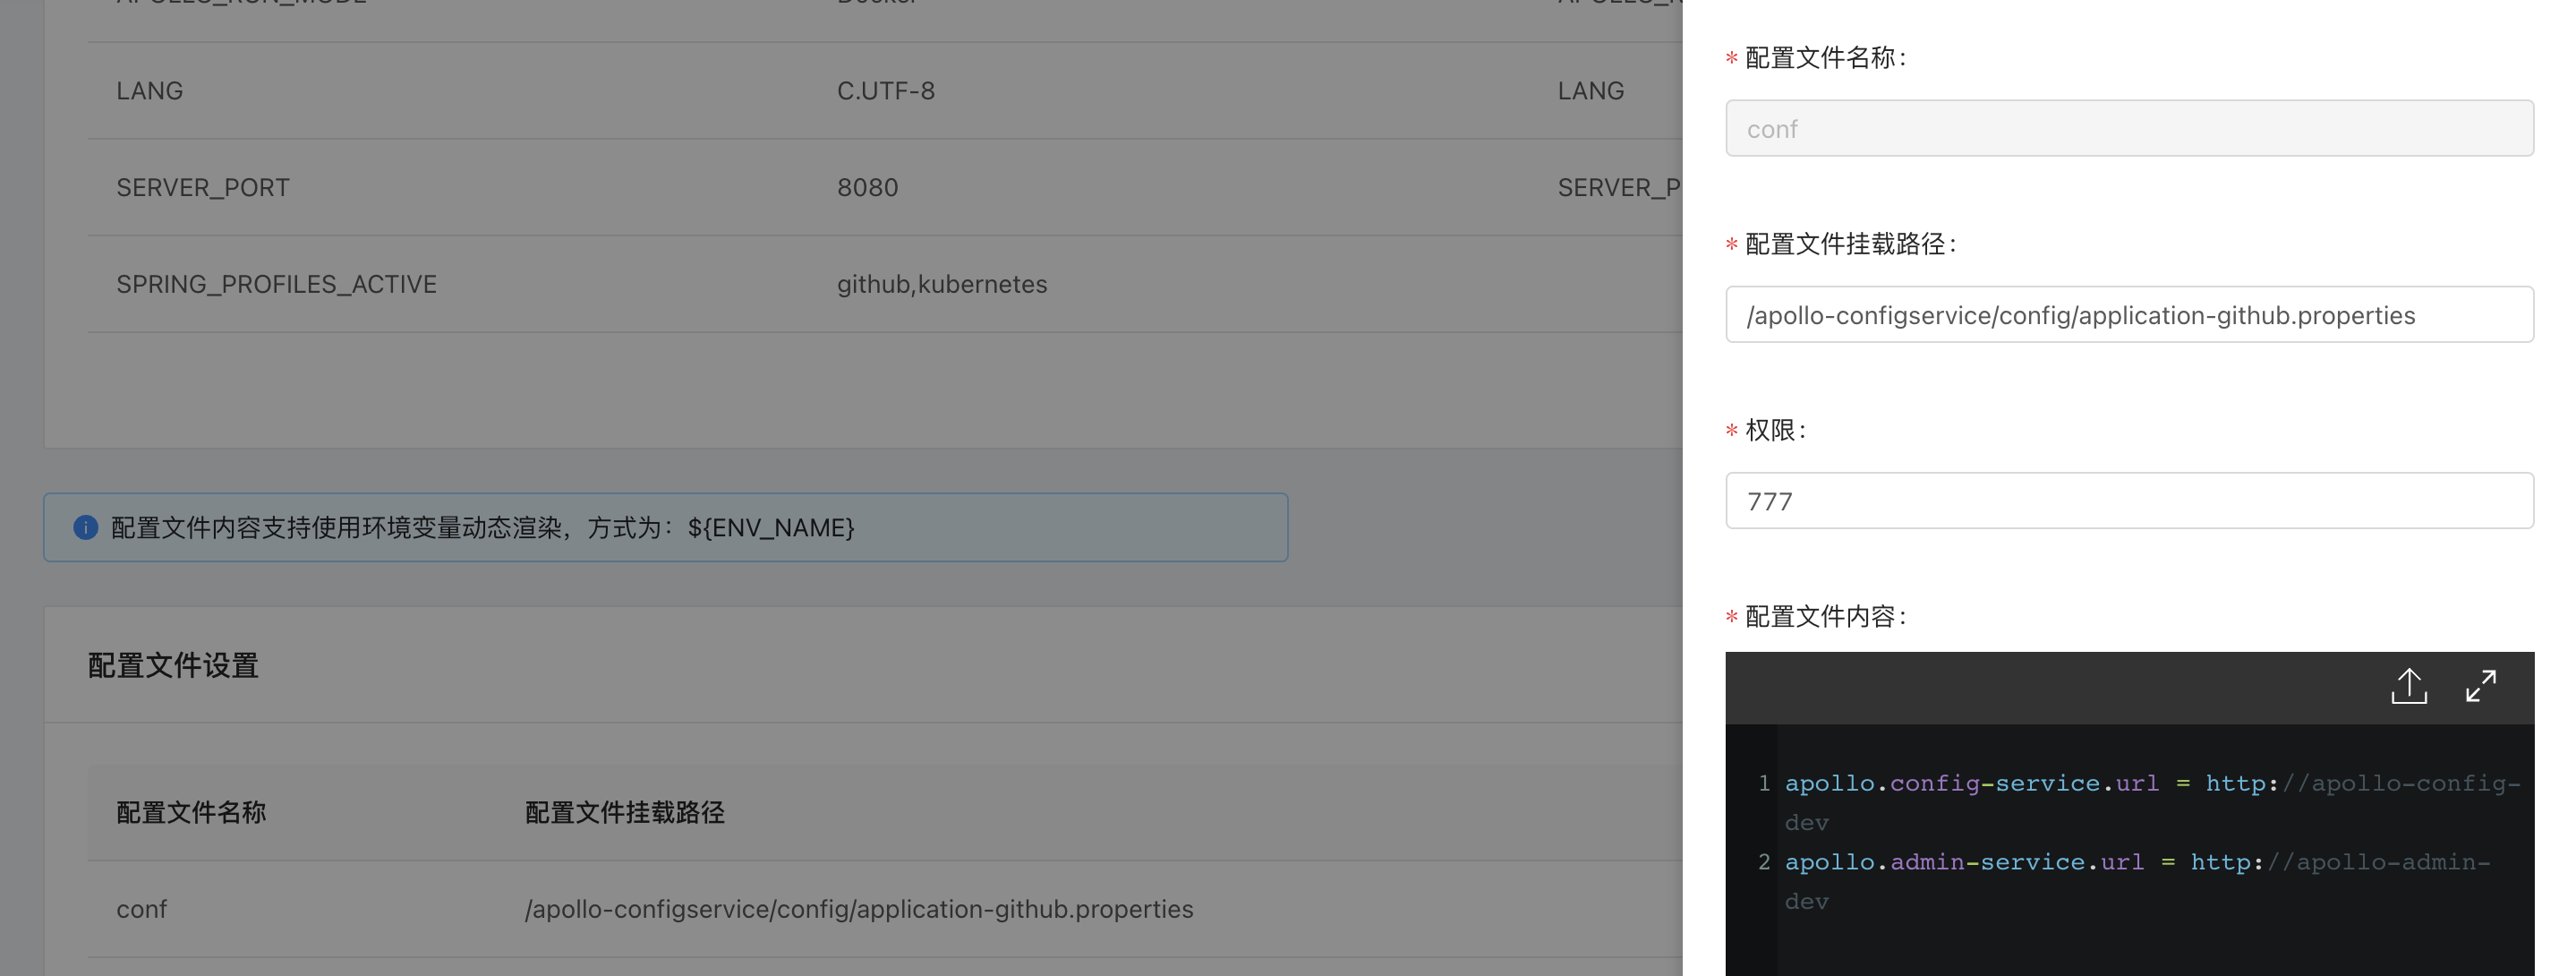
Apollo-config-Devconfiguration file/apollo-configservice/config/application-github.properties, and modify the service addresses of config and admin to the expected values.
- Enter the plug-in pages of
Apollo-config-DevApollo-portal-1.9.2respectively, modify the configuration for its export network governance plug-in, Rainbond's built-in microservice framework, and define downstream services through the set domain names (Domains) access address.TakeApollo-portal-1.9.2as an example, you need to configure the access domain names toApollo-config-DevApollo-admin-Dev.

After the configuration is complete, click to update the configuration, Apollo-portal-1.9.2 to access Apollo-config-Devthrough the domain name apollo-config-dev.
Similarly,Apollo-config-Dev needs to be configured to the access domain name of Apollo-admin-Dev.Update the configuration after the configuration is complete.
- Modify the configuration of
Apollo-portal-1.9.2to add the newDEVenvironment.
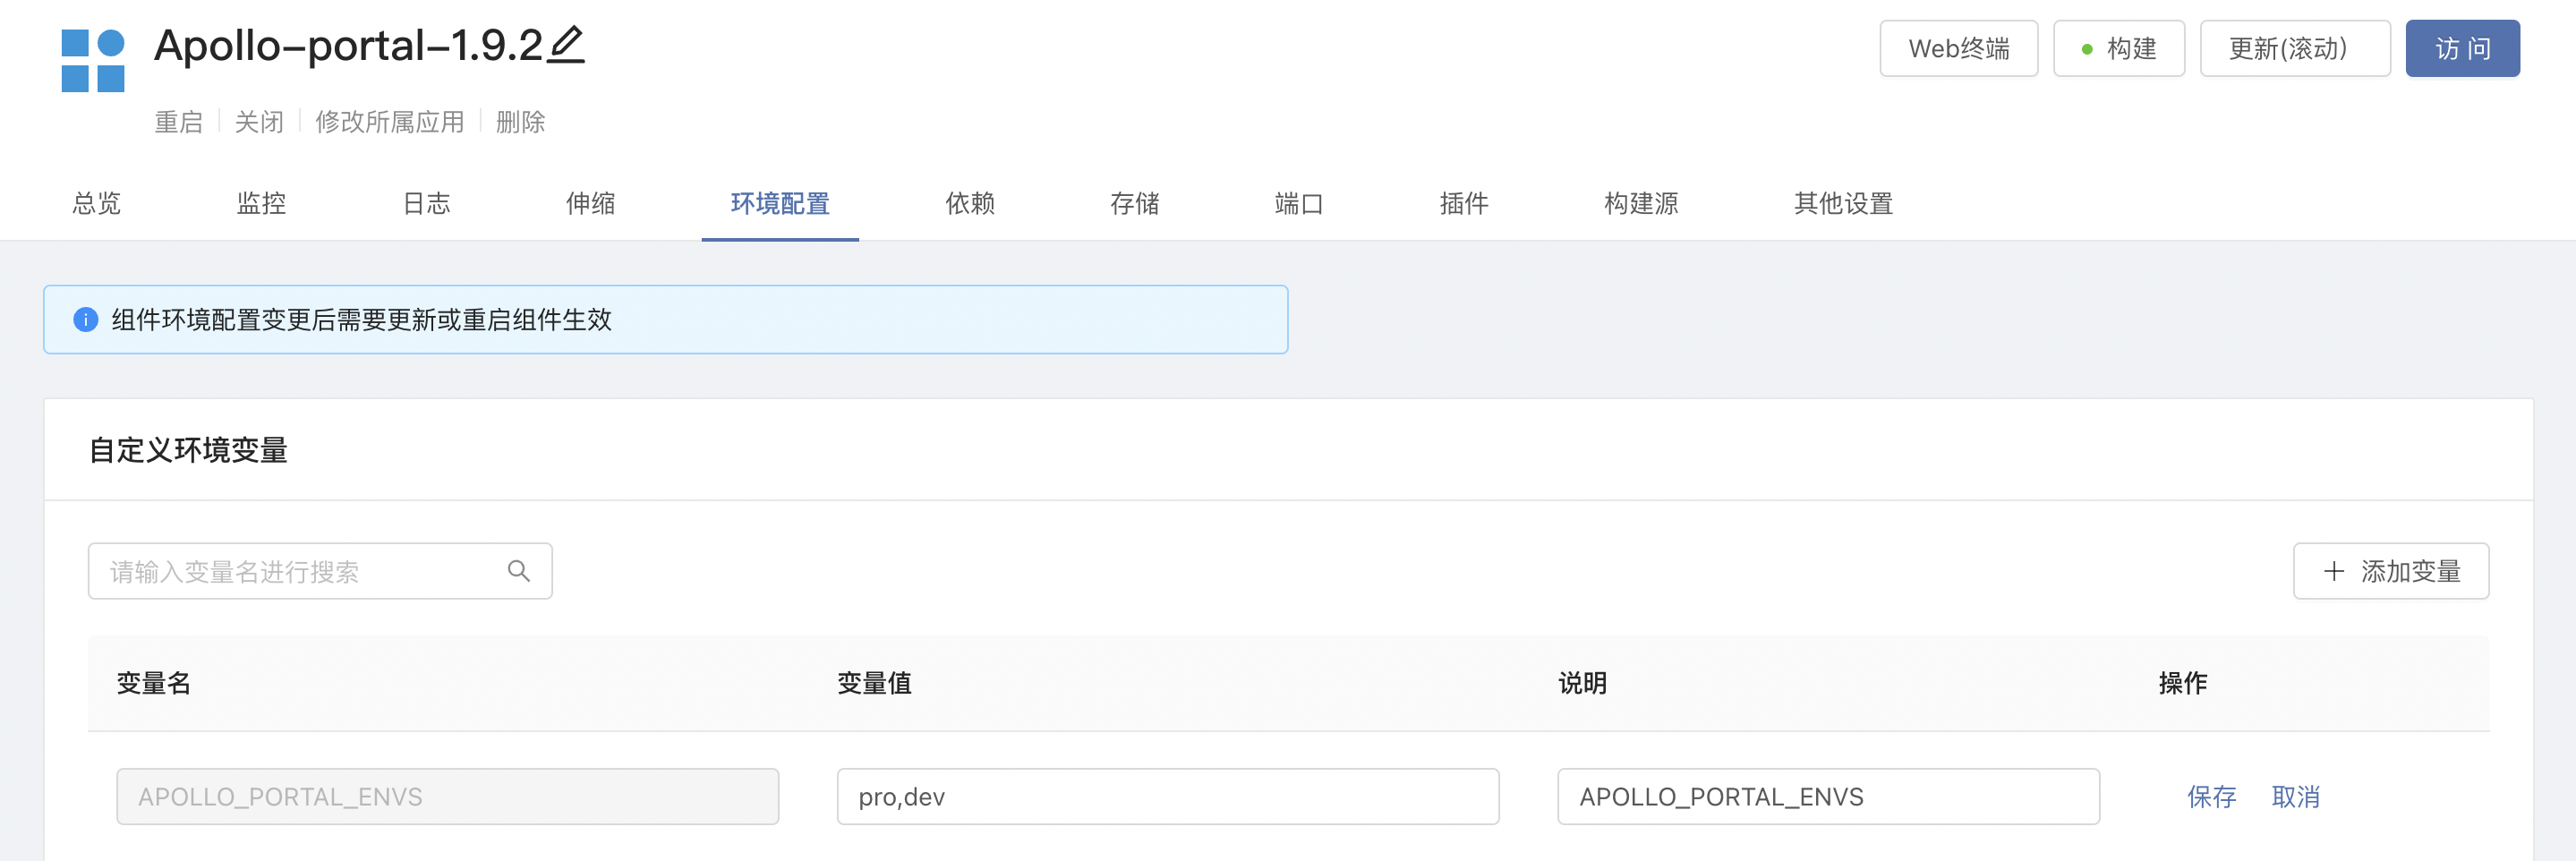
Modify the value of the environment variable APOLLO_PORTAL_ENVS and add the dev environment.
Modify the configuration file /apollo-portal/config/apollo-env.properties and write the meta address of the dev environment.
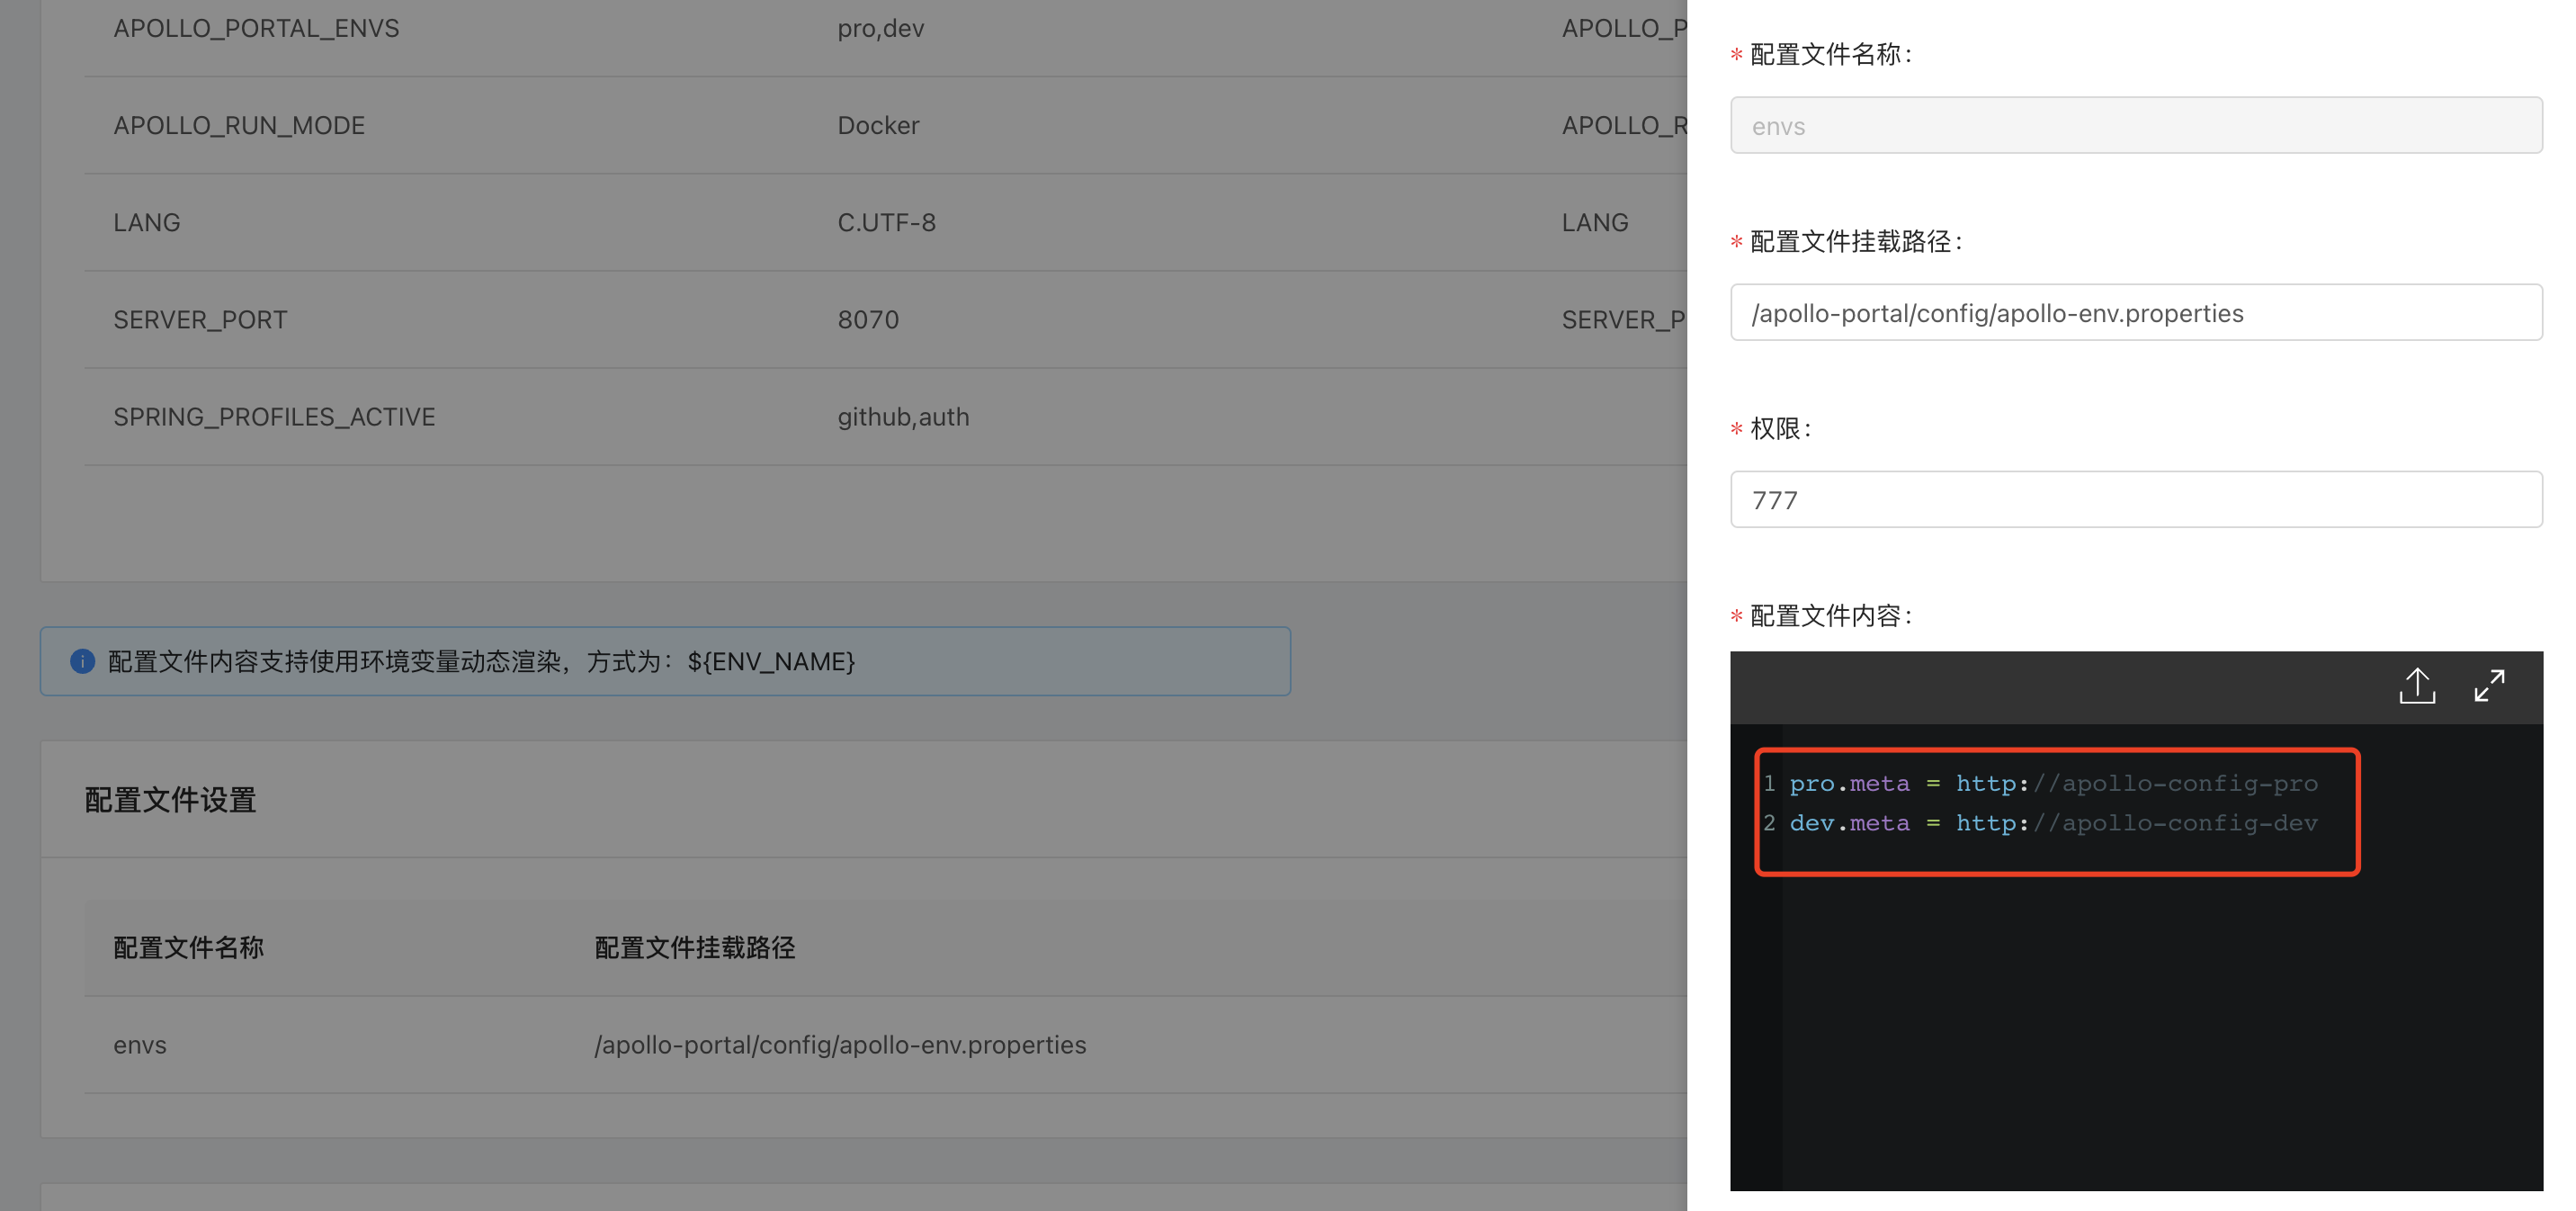
Update Apollo-portal-1.9.2 component to make all configurations take effect.Check the system information and verify that the environment is added.
