Two years ago, Service Mesh (Service Mesh) became popular as soon as it came out. Many people think it is the final form of microservice architecture, because it can decouple business code from microservice architecture, that is, business The code does not need to be modified to implement the microservice architecture, but the decoupling is not thorough enough, and it is still inconvenient to use. Although the architecture is decoupled, the deployment has not been decoupled.
- It is impossible to choose a suitable Service Mesh framework according to different environments or customer needs.
- It is impossible to learn and use Service Mesh in the development environment, and enable the production environment on demand. :::
Plug-in Service Mesh Architecture Implementation Ideas
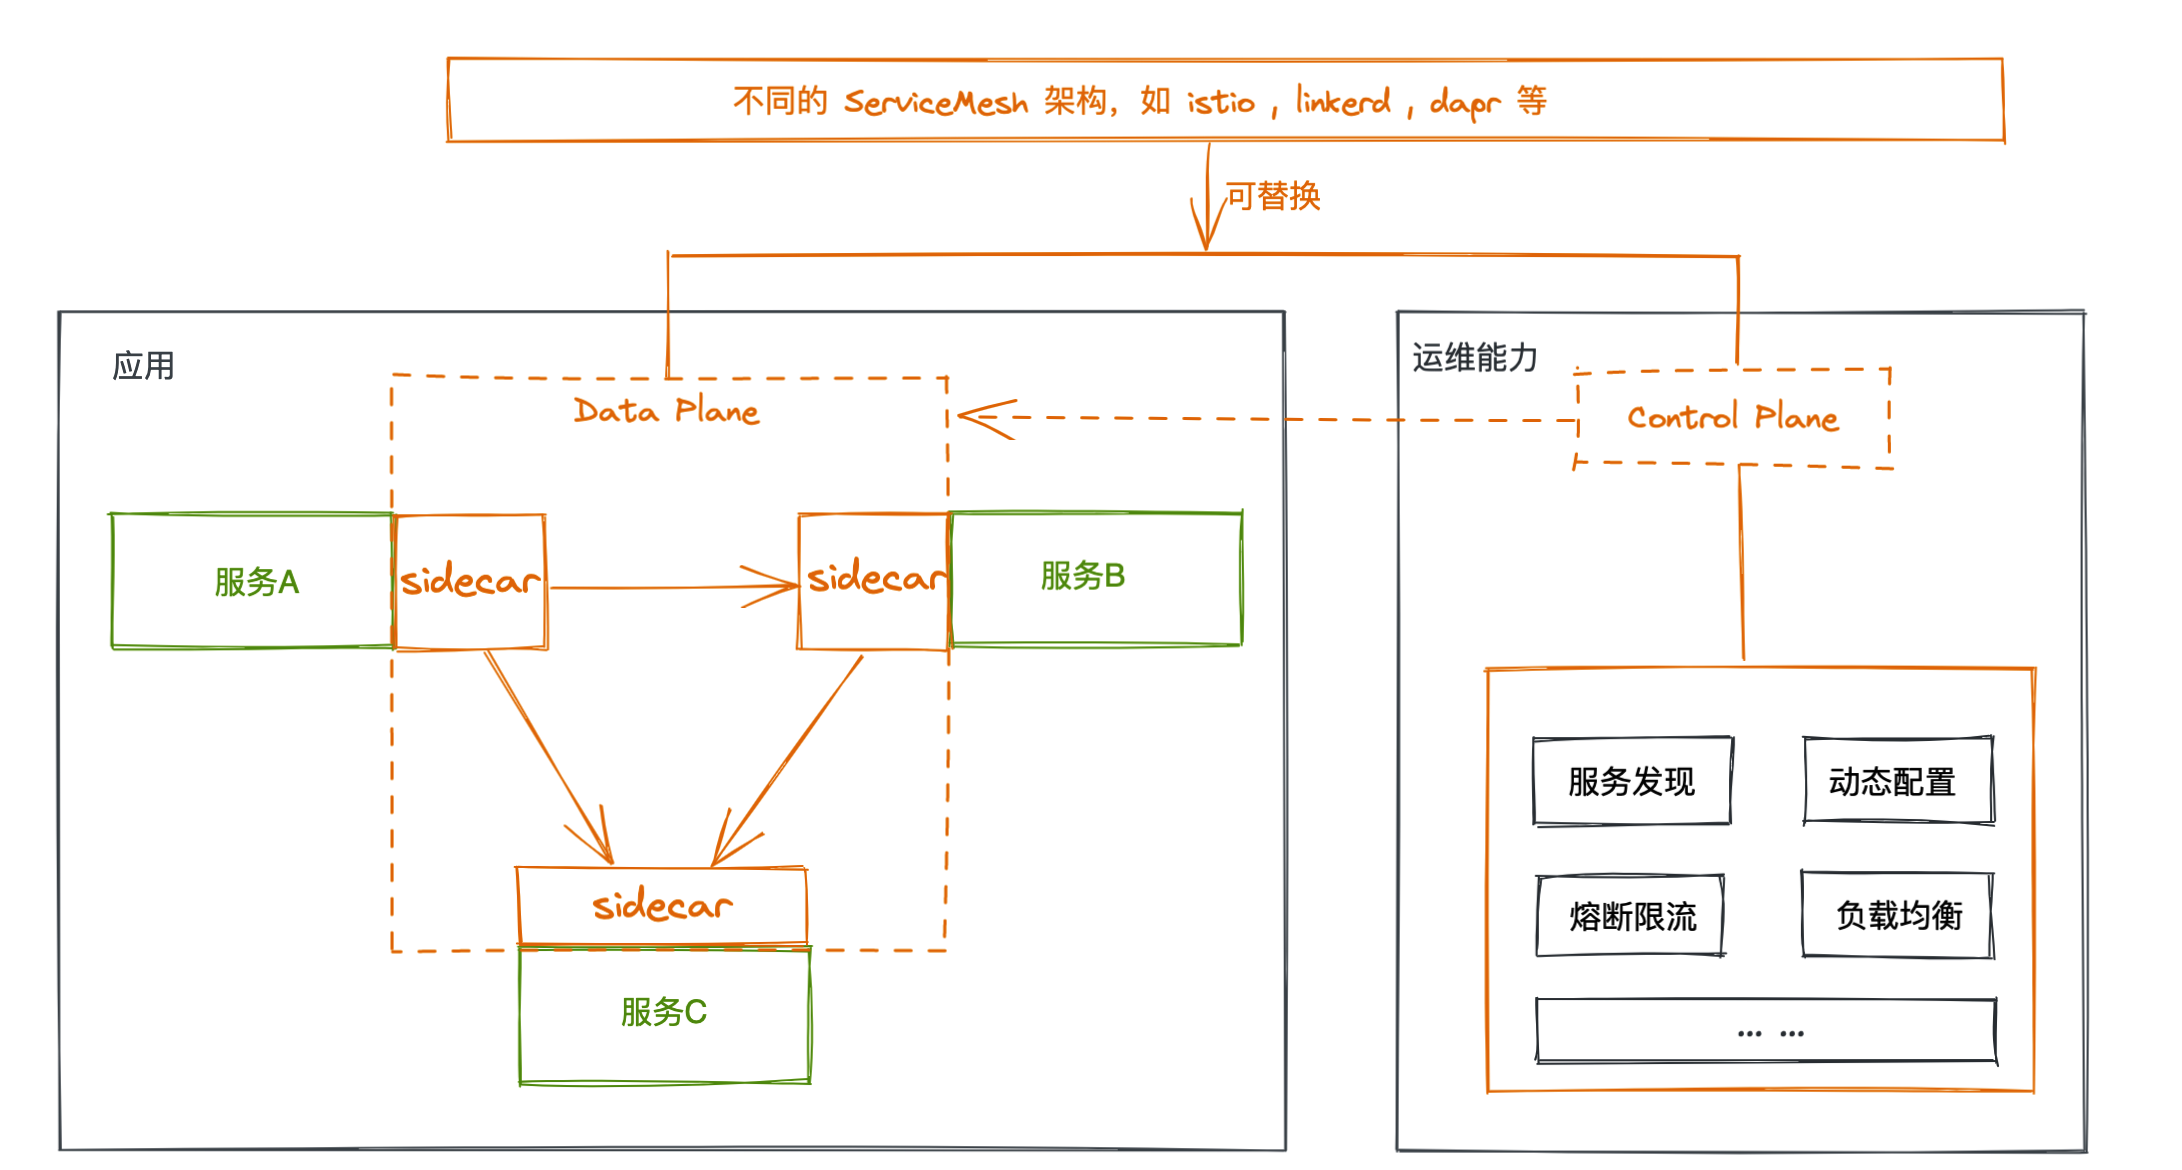
There are also many mature ServiceMesh frameworks, but for users.There is no omnipotent ServiceMesh framework that can solve problems in various scenarios.Therefore, we hope that for the user, he only needs to care about his business code.The application governance capabilities can be expanded through different ServiceMesh frameworks.The user's business code is completely decoupled from the ServiceMesh framework.As shown below.Users can replace the ServiceMesh architecture used by an application at any time.Choose the solution that best matches your business.

Based on the above ideas, we can make istio, linkerd, dapr and other microservice architectures into plug-ins. During the development process, we do not need to know the existence of the Service Mesh framework. We only need to deal with the dependencies of the business. When delivering to the production environment or customer environment , some require high performance, some require full functions, and some customers have specified various requirements. You can open different types of plug-ins as needed according to the environment and customer needs. When there is a problem with the Service Mesh framework, you can switch it at any time.In this way, the Service Mesh framework becomes an enabling tool, and the redeployment of the old business system can immediately open the service governance capability.
Rainbond is implemented based on the above ideas. The current version has implemented three service governance plug-ins.
- kubernetes native service mode
- Envoy-based Service Mesh Mode
- Istio service governance model
Later, we will explain in detail the process of using the Istio service governance model.
Practice using the Istio governance model
With the above concepts, we can take a look at how Rainbond integrates with Istio.In Rainbond, users can set different governance modes for different applications, that is, users can manage applications on demand by switching the governance mode of the application.The advantage of this is that users can not be bound by a certain ServiceMesh framework, and can quickly trial and error, and can quickly find the most suitable ServiceMesh framework for the current business.
Install the Istio control plane
First, when switching to the Istio governance mode, if the Istio control plane is not installed, you will be prompted to install the corresponding control plane.Therefore, we need to install the Istio control plane. The control plane only needs to be installed once in a cluster. It provides a unified management entry to manage services that work in the Istio governance model.Complete functions such as configuration and delivery.Combined with Rainbond's existing helm installation method, we can easily install the corresponding components.
1. Create a team
In version 5.5.0, we supported users to specify namespaces when creating teams.Since the default helm installation namespace is istio-system, in order to reduce user configuration.We first need to create the corresponding team.As shown below.The English name of the team corresponds to the namespace of the team in the cluster.Fill in istio-system here.

2. Docking store
Rainbond supports direct deployment of applications based on helm, so the next step is to connect to the official Rainbond helm warehouse, and then deploy Istio based on the Helm store. On the application market page, click Add store, select the helm store, and enter the relevant information to complete the connection.
Store Address:https://openchart.goodrain.com/goodrain/rainbond

3. Install the Istio control plane
After the store is created, you can see the corresponding helm application. Currently, Rainbond provides the helm package of version 1.11.4 of . According to the officialdocument1, this version supports Kubernetes cluster versions 1.19, 1.20, 1.21, 1.22 .
Install the base app
Select the base application in the helm store to deploy, and the team selects the previously created team whose namespace is istio-system.This application package mainly deploys Istio-related cluster resources and CRD resources.

Install the istio-discovery app**
As with the base app above, select the correct team.Install the istio-discovery app.With these two applications, you can have the governance capabilities of Istio.
The sample application enables Istio governance mode
1. Switch governance mode
Let's take the SpringBoot background management system Ruoyi as an example, as shown in the figure below, users can first install a Ruoyi SpringBoot application from the open source application store, select the version 3.6.0, click the governance mode switch, and select the Istio governance mode.

After clicking to switch to the Istio governance mode, the user needs to manually set the internal domain name. The internal domain name here will be the service name of the component in the Kubernetes cluster, which is unique under the same team.Here we modify it to a more readable internal domain name.

2. Modify the configuration file
After this step is completed, we also need to go to ruoyi-ui to mount a new configuration file.This is mainly because by default, the back-end service address in the configuration file web.conf ofruoyi-ui is 127.0.0.1. When using Rainbond's built-in ServiceMesh mode, Rainbond will obtain the address of the back-end service. , inject it into ruoyi-ui , and give ruoyi-ui a local access address (127.0.0.1) to access the backend service.So it can be used without modification.
However, when the Istio governance mode is used, the components communicate through the internal domain name, so the corresponding proxy address needs to be modified by mounting the configuration file. The configuration file ofruoyi-ui can be accessed through the Web terminal on the upper right to access the container , copy the contents of the file /app/nginx/conf.d/web.conf.After modifying the proxy address, save it, as shown in the following figure.Earlier we set the internal domain name of the console to ruoyi-admin, so replace it with ruoyi-adminhere.

3. Restart the app
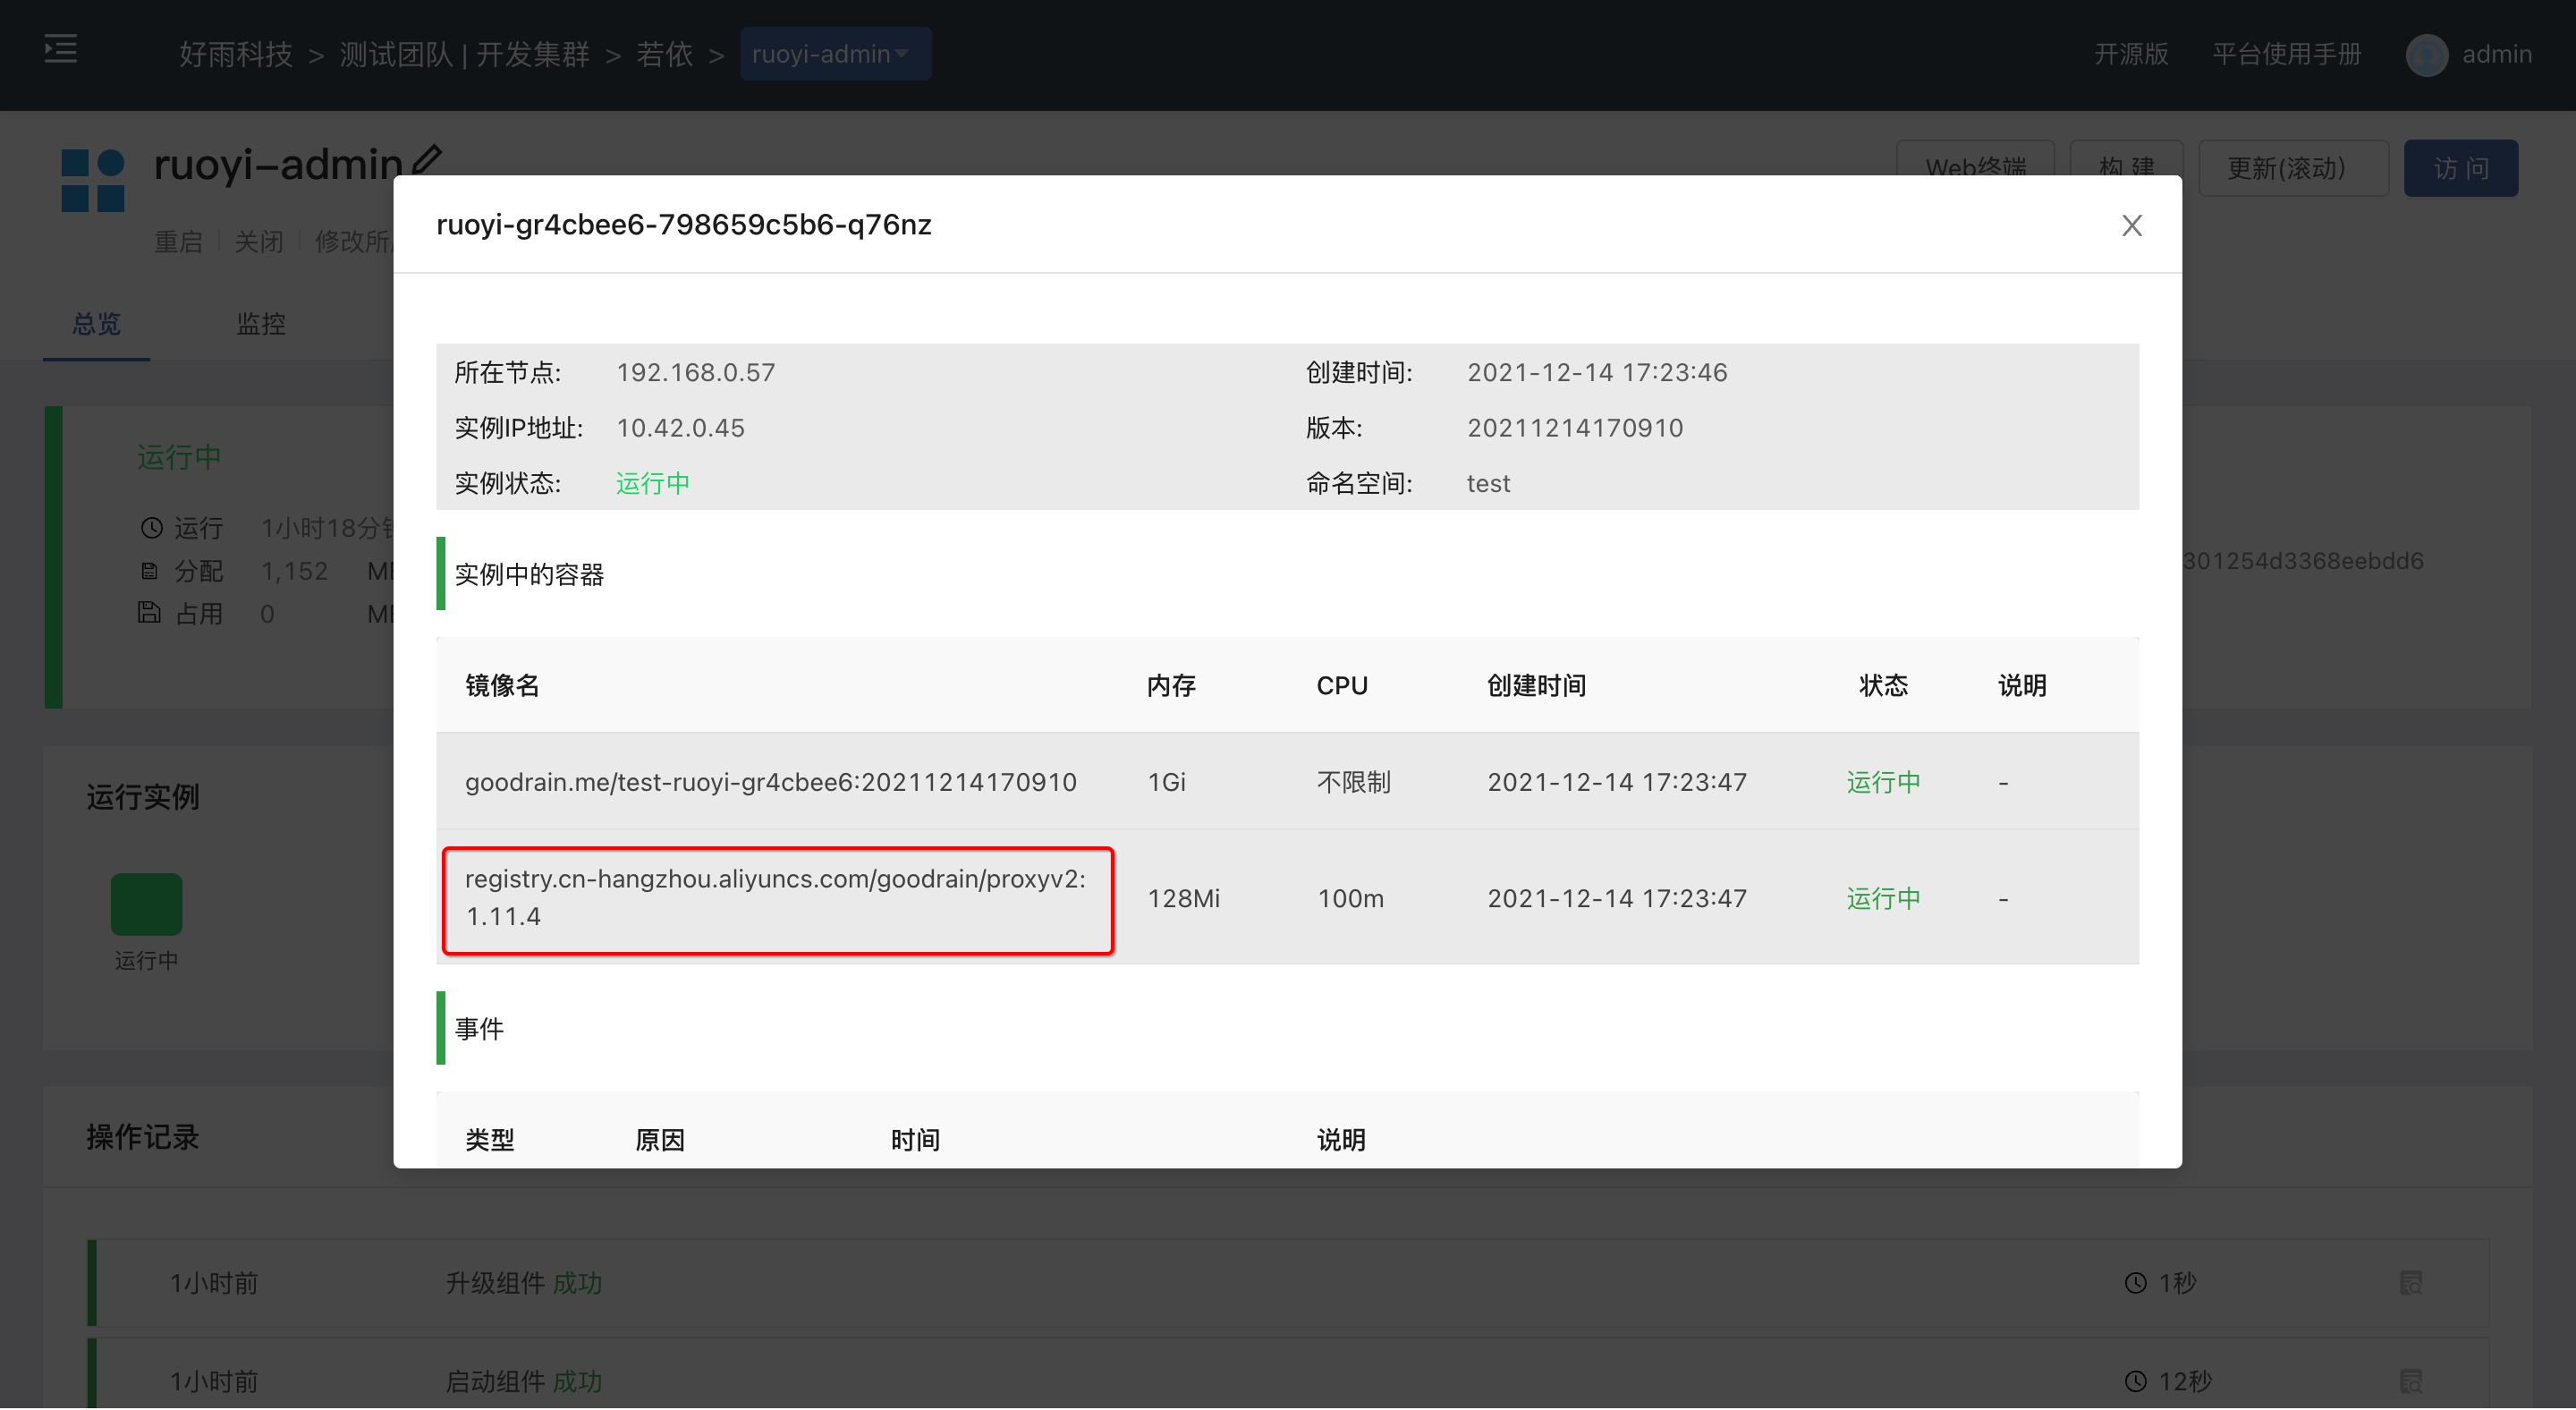
After completing the above two steps, we need to restart the entire application.After starting the application, go to the component page to view, you should see that each component has a similar Sidecar container, which is the data plane of Istio. After the application is switched to the Istio governance mode, all the Components will be automatically injected into the corresponding sidecar container, no additional user settings are required.
So far, the application has been included in the scope of Istio governance.If users need more configuration of the application, they can refer to Istio official document for expansion.

Monitor and manage Istio with Kiali
In the previous steps, we hosted or using the Istio governance model.Next, let's take a look at how to use Kiali to observe the communication link between applications.In this step, the user needs to have kubectl commands.
1. Install prometheus
In Istio, each component allows Prometheus to periodically capture data by exposing the HTTP interface (using the way of Exporters).Therefore, after the Istio control plane is installed, Prometheus needs to be deployed in the istio-system namespace, and the data source of each relevant indicator of the Istio component is configured in Prometheus by default.
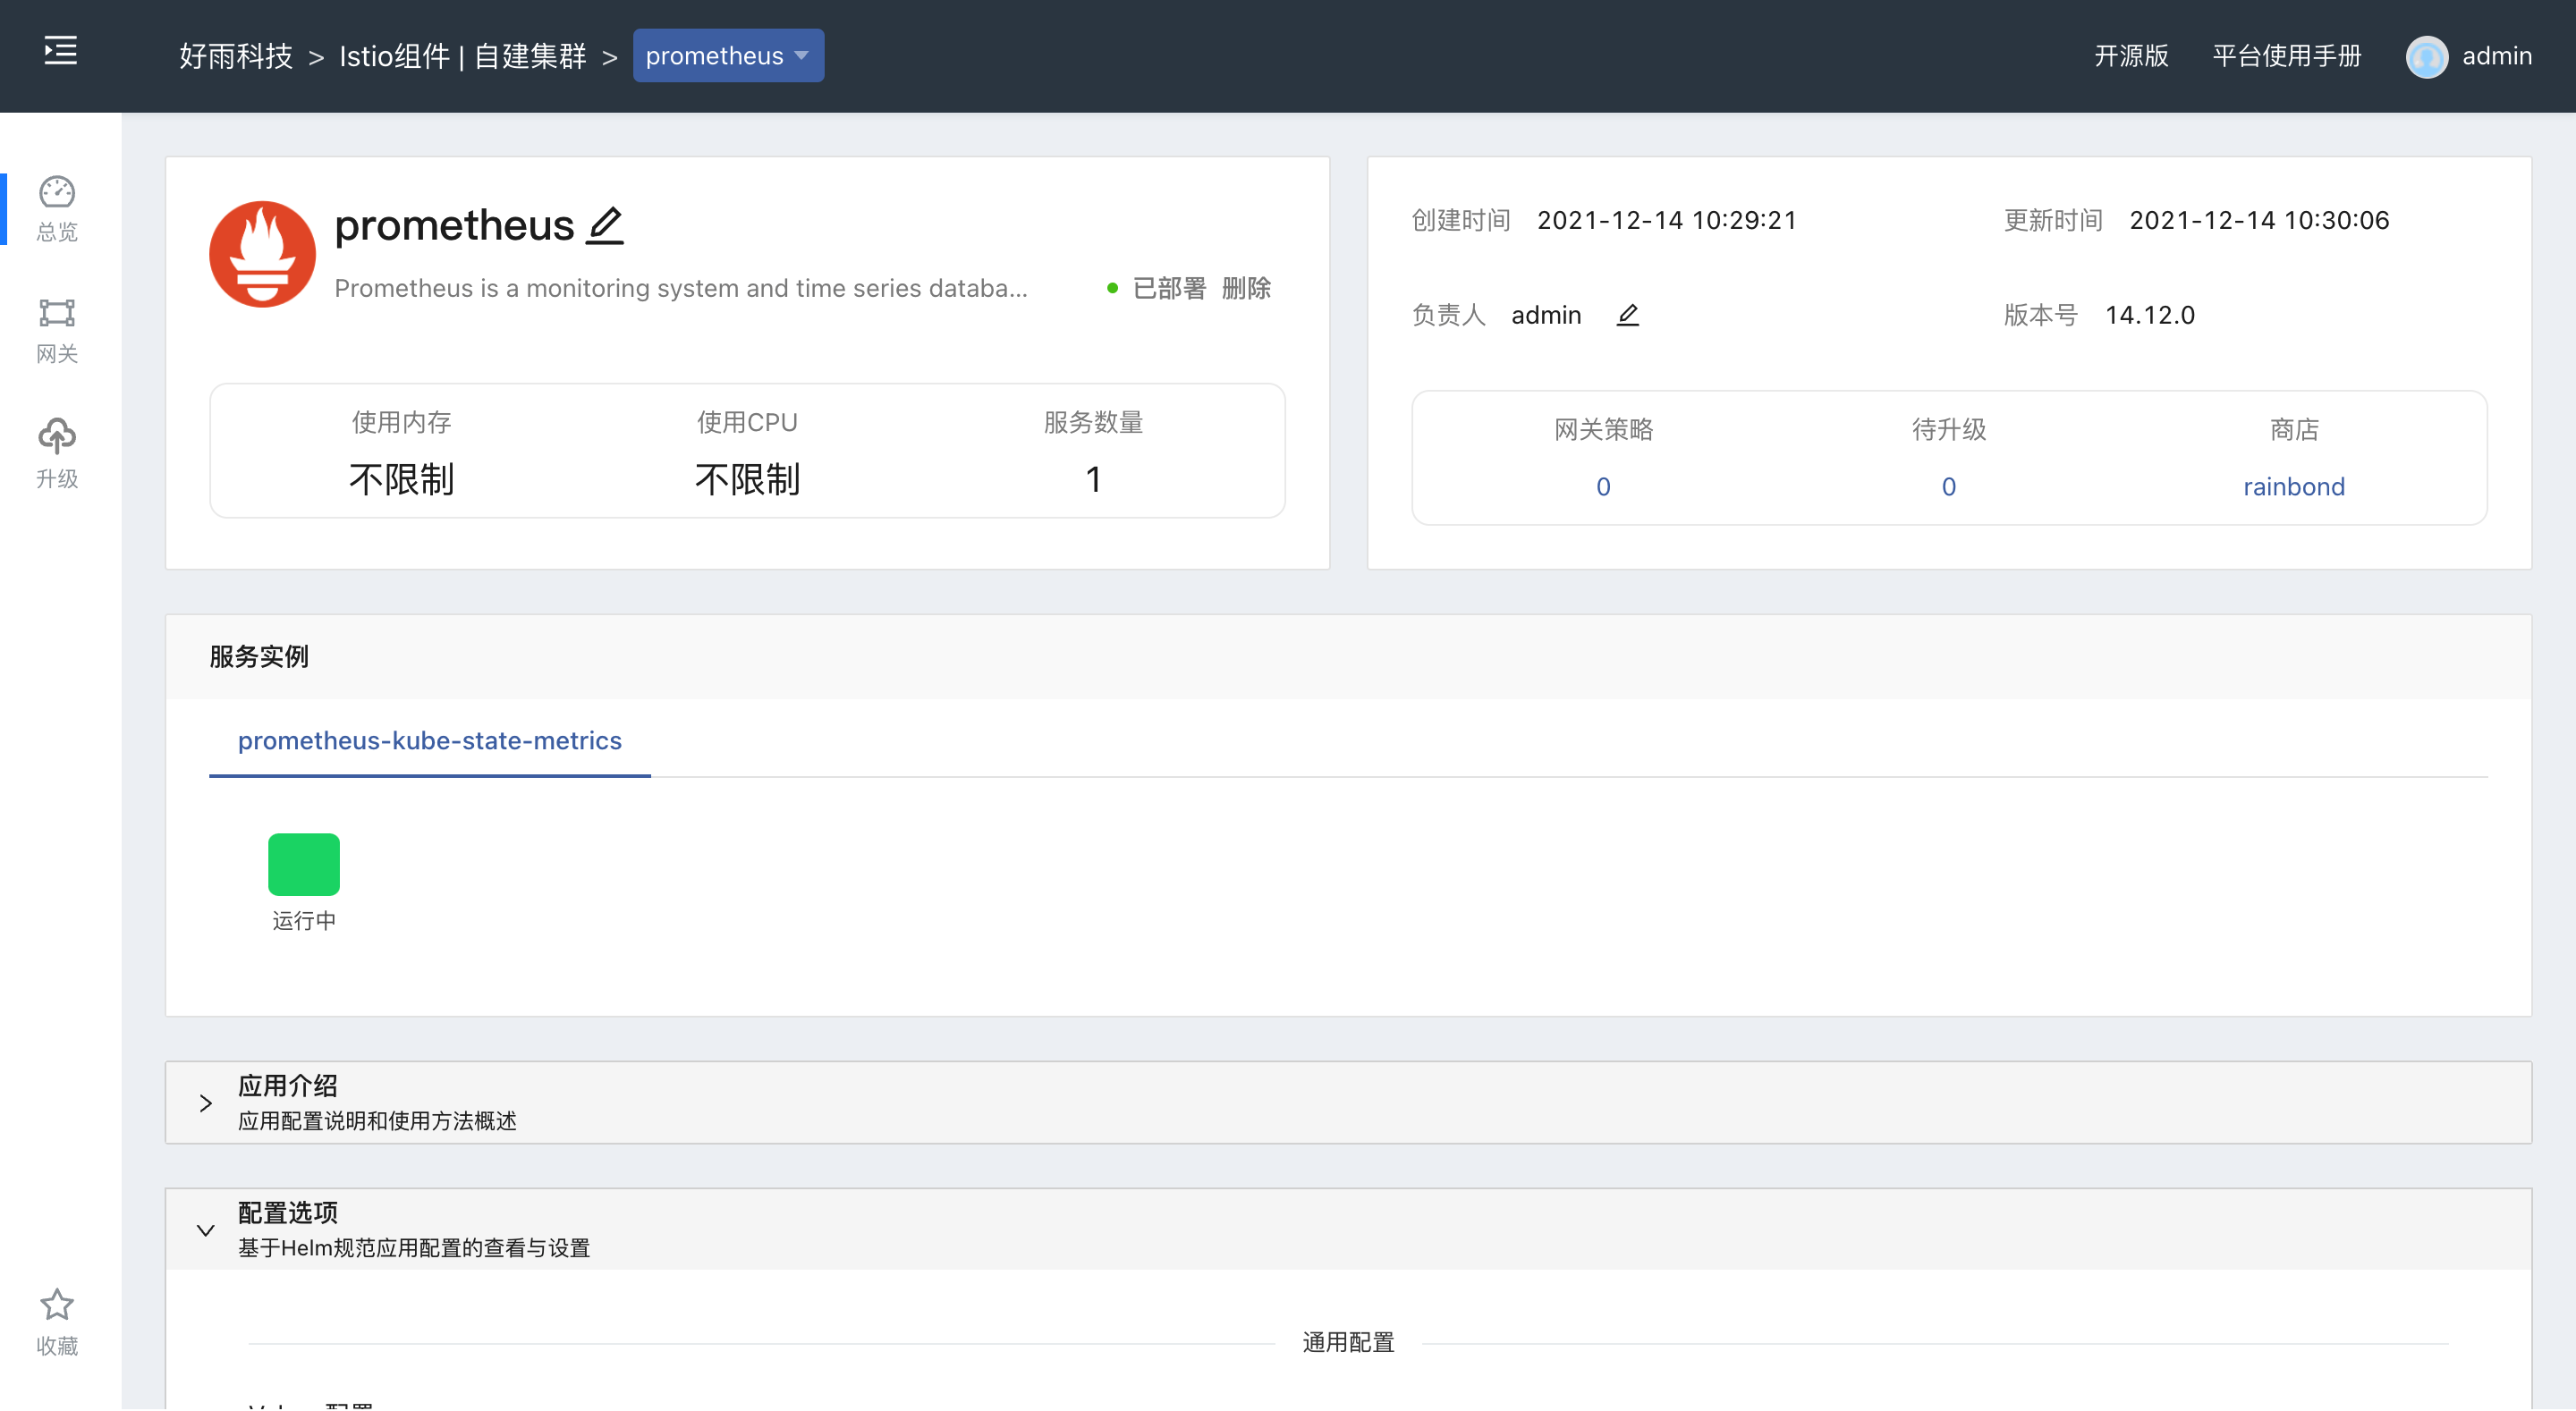
As with the base app above, select the correct team and install the Prometheusapp.

2. Install kiali
kialiprovides a visual interface to monitor and manage Istio, which can display service topology relationships and configure services.
Install the kiali-operator app, same as the base app above, select the correct team.
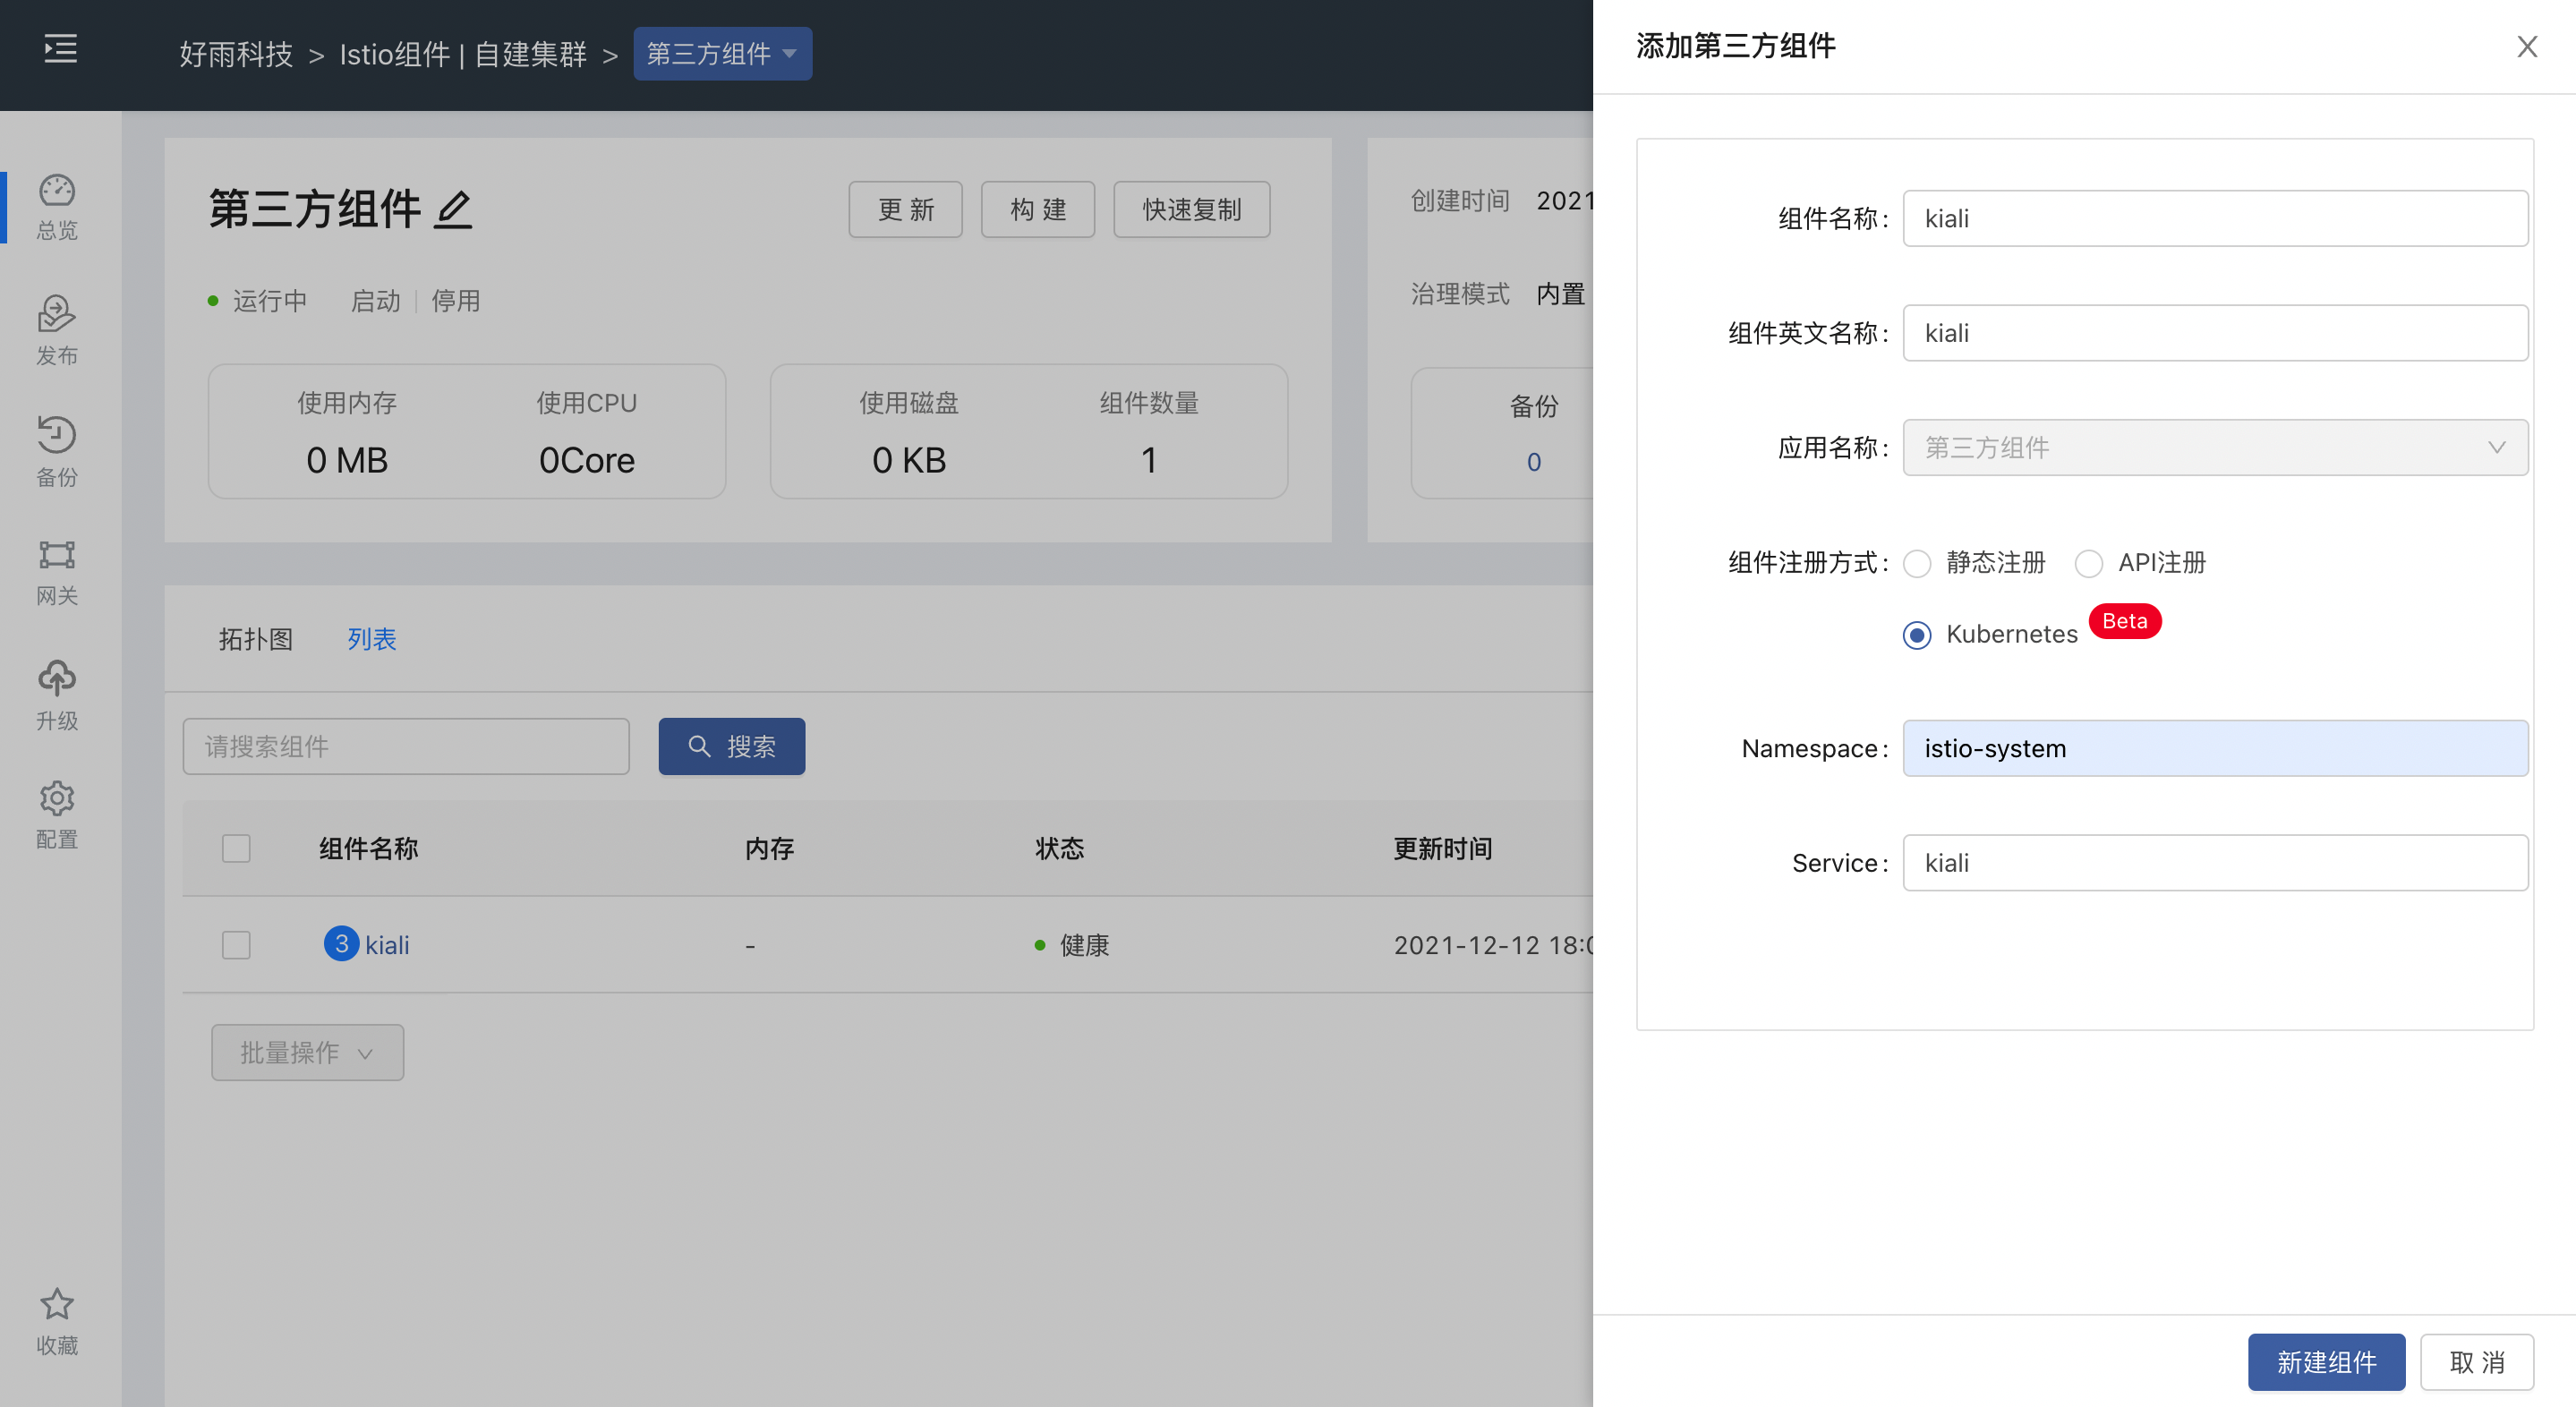
The installation process will automatically create a Service, and the access port of kiali can be exposed in the form of a third-party component of the Rainbond platform.as shown below:

Add an access port in the port interface, and after adding, openexternal serviceand use the generated gateway policy to access.

kiali requires an authentication token when logging in, use the following command to get token:
kubectl describe secret $(kubectl get secret -n istio-system | grep istiod-token |awk '{print $1}') -n istio-system
After accessing kiali, in the Applications column, select the namespace where the application is located, and you can see the application we just created.Click to enter, you can see the flow route as follows.

In the Graph column, you can also see the corresponding in-app traffic requests.For more configuration and related functions, please refer to Kiali Official Documents
Summarize
This article briefly introduces the operation of using the Istio governance model in Rainbond.And the combination of Rainbond and the Istio governance model.Rainbond provides users with an optional plug-in system, allowing users to choose different Service Mesh frameworks according to their needs.In combination with Istio, we mainly complete the injection of the specified application data plane for users.Users can also extend the ServiceMesh framework they need through this mechanism.In the follow-up article, we will explain in detail how to make a plug-in, so please pay attention.