Deploy Wordpress based on Helm application
Helm is an open source package management tool in Kubernetes. Rainbond supports the deployment of Helm applications since version 5.3.1.Implement convenient deployment and access control of Helm applications.To enable Rainbond users to use applications defined by the Kubernetes ecosystem, the main scenario is to install and use middleware applications.
This article will introduce the installation and management of applications connected to Helm by the Rainbond platform. Through a specific example, learn how to connect to the Helm warehouse, install and manage applications in the Helm warehouse.
Preconditions
- Deployed
v5.3.1-releaseand above Rainbond platform. - Have a Helm repository that can be used for docking, example https://charts.bitnami.com/bitnami repository.
Steps
Rainbond docking with Helm repository
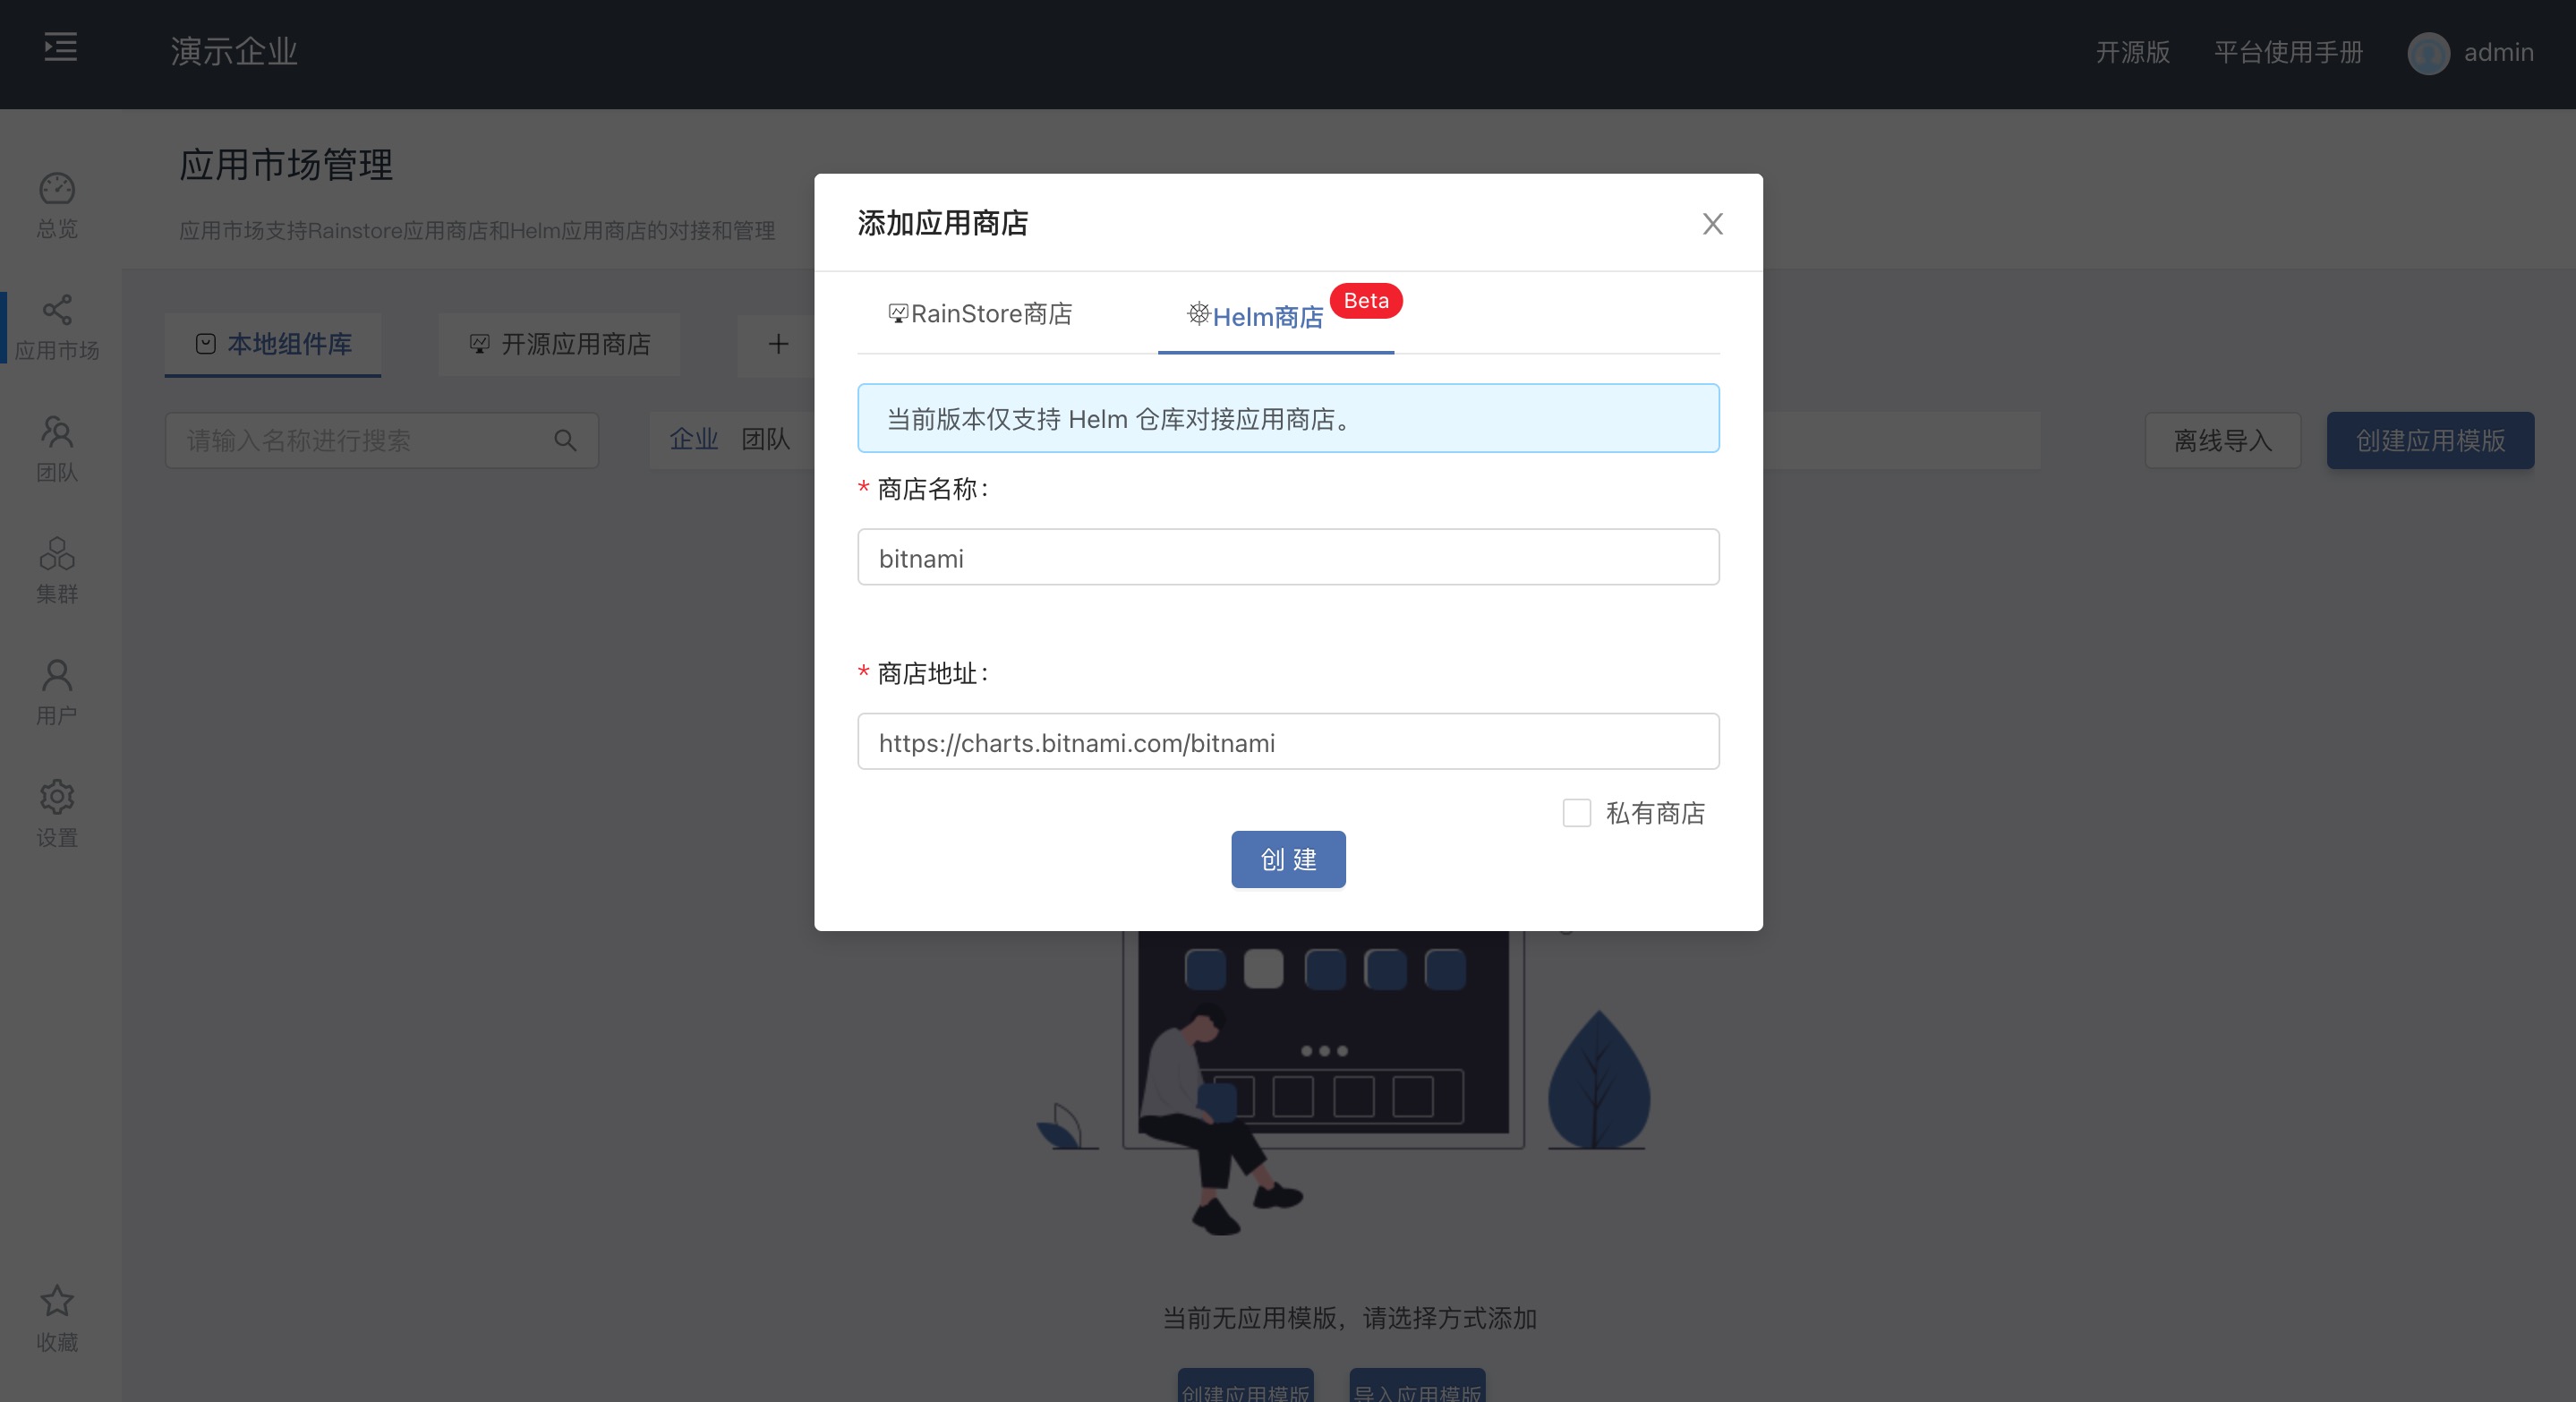
Use enterprise administrator account in enterprise view click application market, click No. + to connect to the new application market, select Helm store, enter the following information, click Create to connect, if it is a private store, select Private Store Enter store username and store password.
Store Name:Custom
Store Address:Helm Warehouse Address

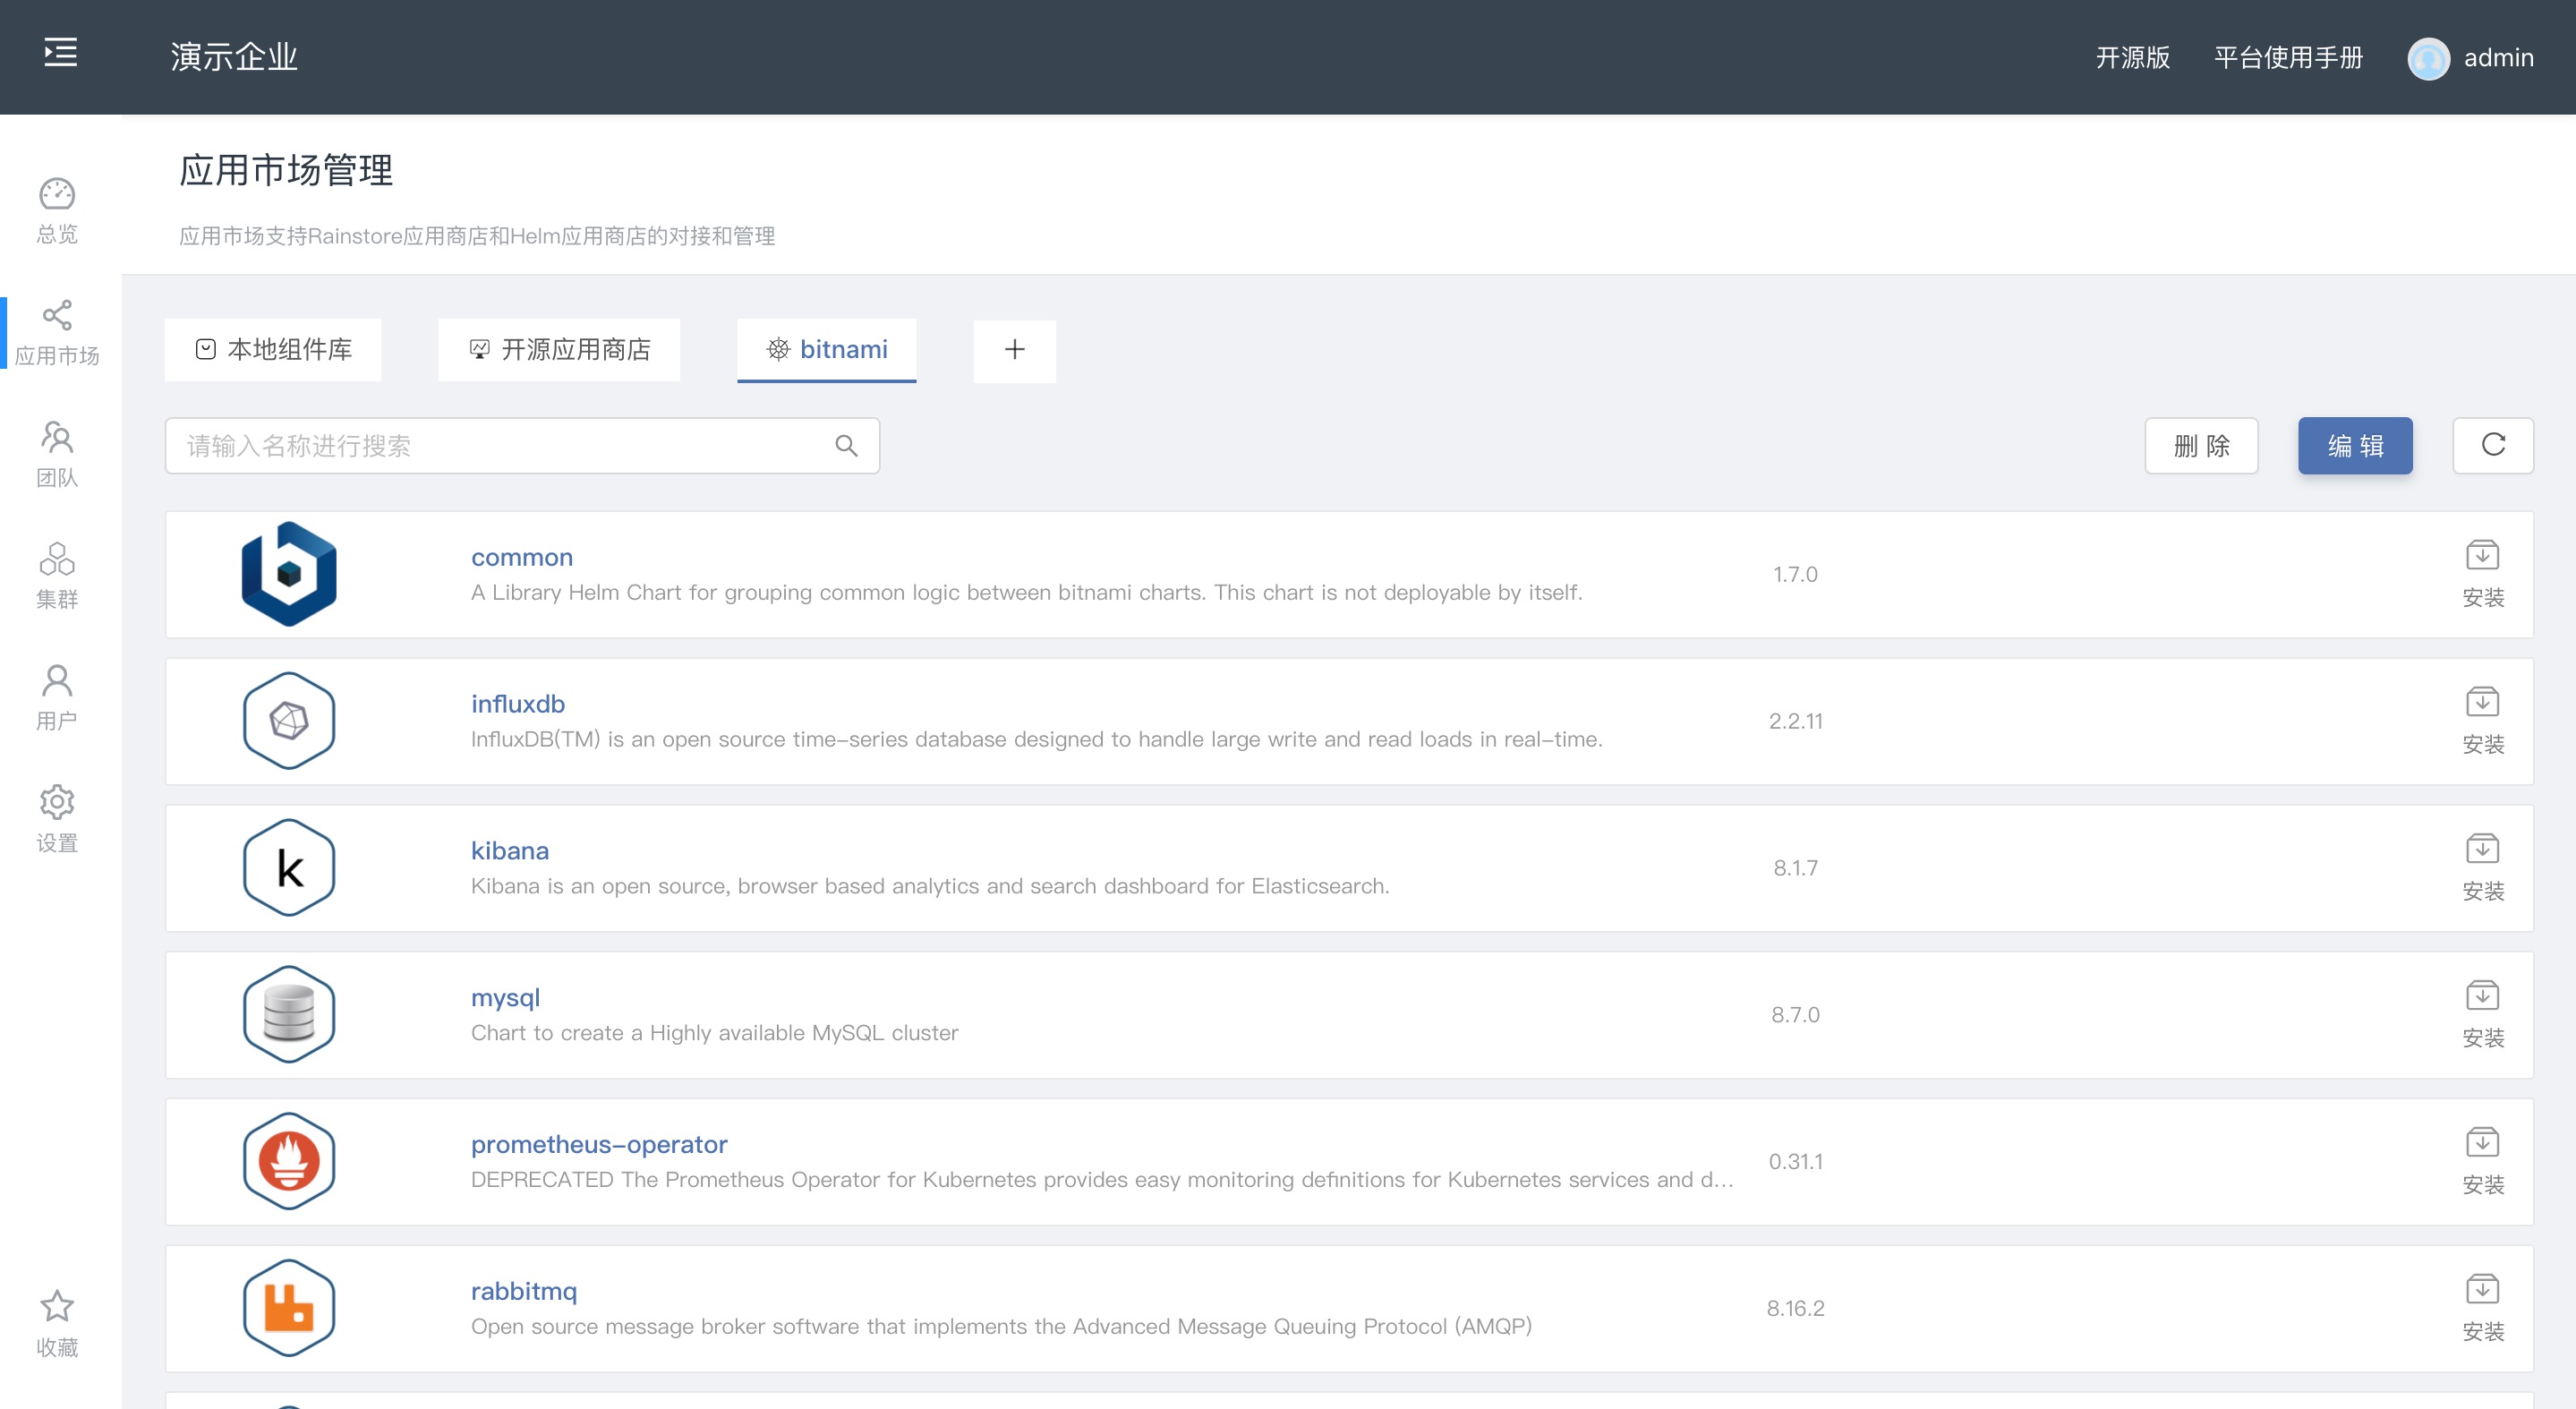
After the docking is completed, the application in the current Helm warehouse will be automatically obtained and displayed

Deploy applications in Rainbond based on the Helm app store
Take deploying a Wordpress application as an example
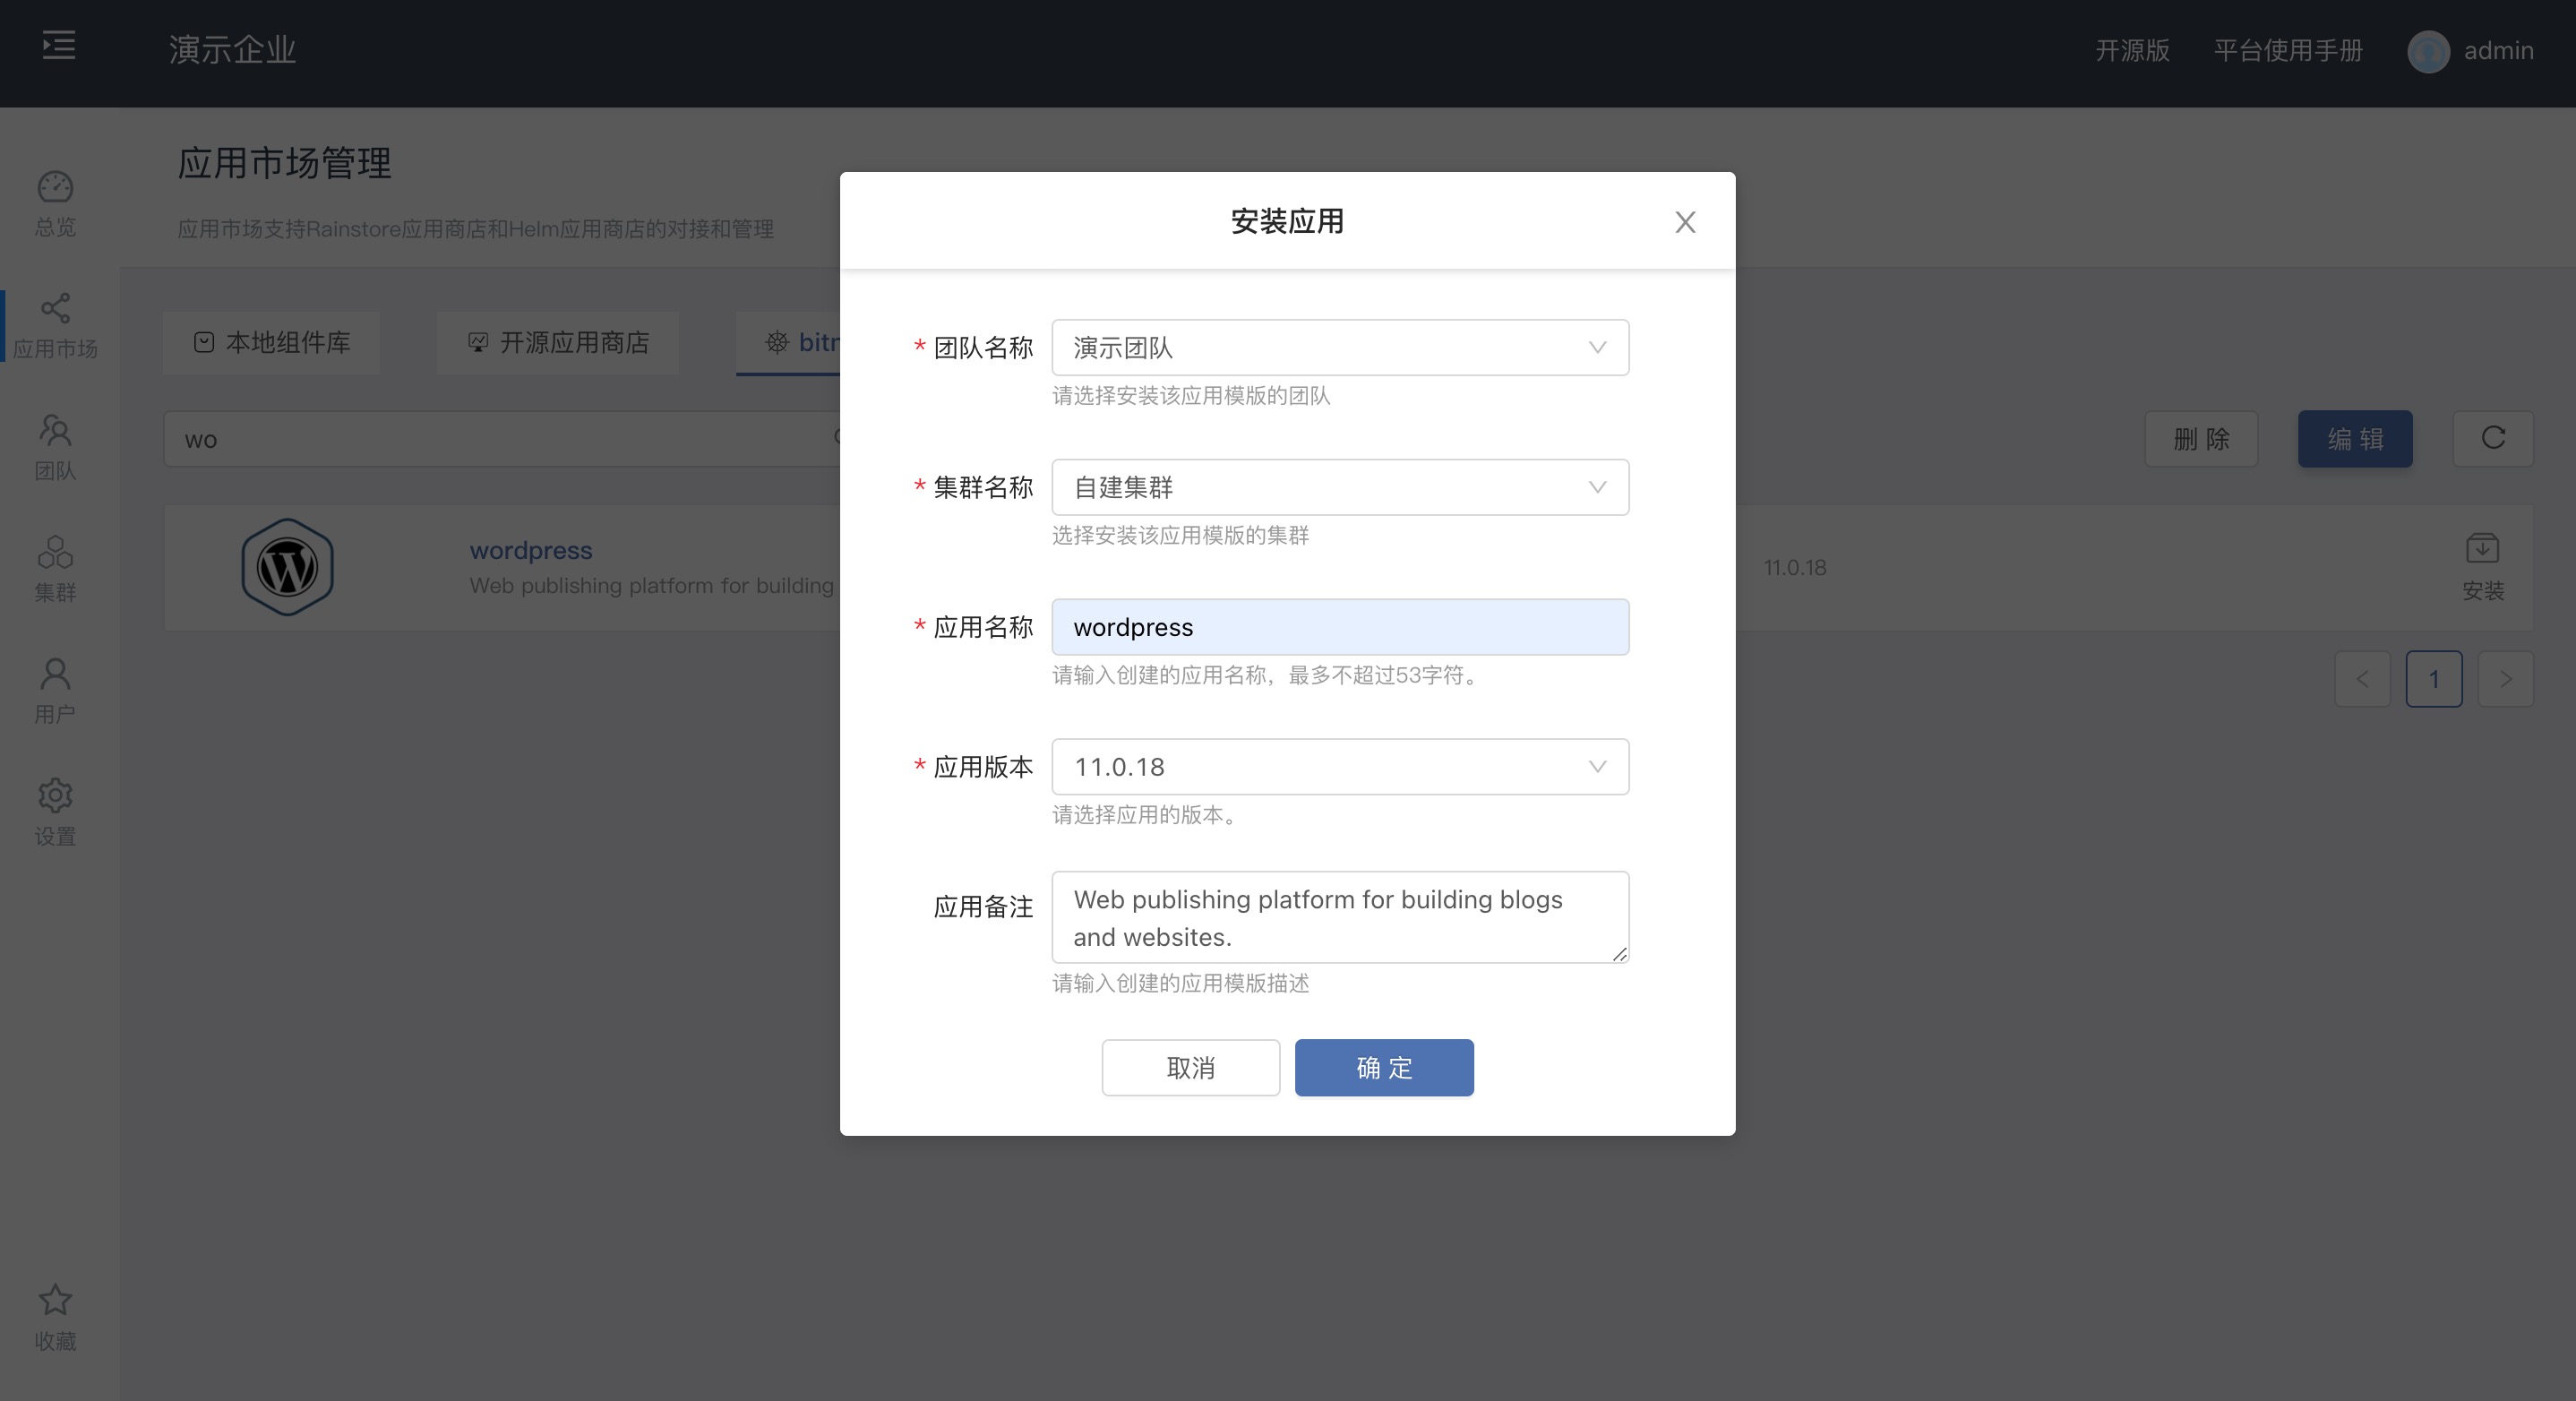
In the enterprise view Helm application market, select Wordpress, click the install button behind the application, select the team to be installed to, define the application name, click to confirm to automatically start the installation.

Installation process

The installation process is divided into the following four steps:
- initialization
Automatically create CR resources required for application deployment
- detect
Detect whether the application can be deployed normally. If the application cannot be deployed normally due to K8s apiVersion problems or other errors, an error message will be displayed here
- configure
Provides the application deployment configuration function, provides a graphical way to modify the values.yaml file configuration, and can choose the values.yaml file used during deployment. For the configuration modification method, see Helm Application Management, it should be noted that Stateful applications When you need to mount the storage, you must specify thestorageClassto be used, and the specification method is as follows:
No.1
Specify in the values.yaml file or specify graphically, and graphically specify referenceHelm application management
No.2
Set the rainbondvolumerwx automatically created when Rainbond is deployed as the cluster default storageClass , then the storageClasswill be used by default when deploying the Helm application. The setting command is as follows
kubectl patch storageclass rainbondvolumerwx -p '{"metadata": {"annotations":{"storageclass.kubernetes.io/is-default-class":"true"}}}'
- Install
After the above steps, enter the installation process, and the application can be used after installation.
app usage
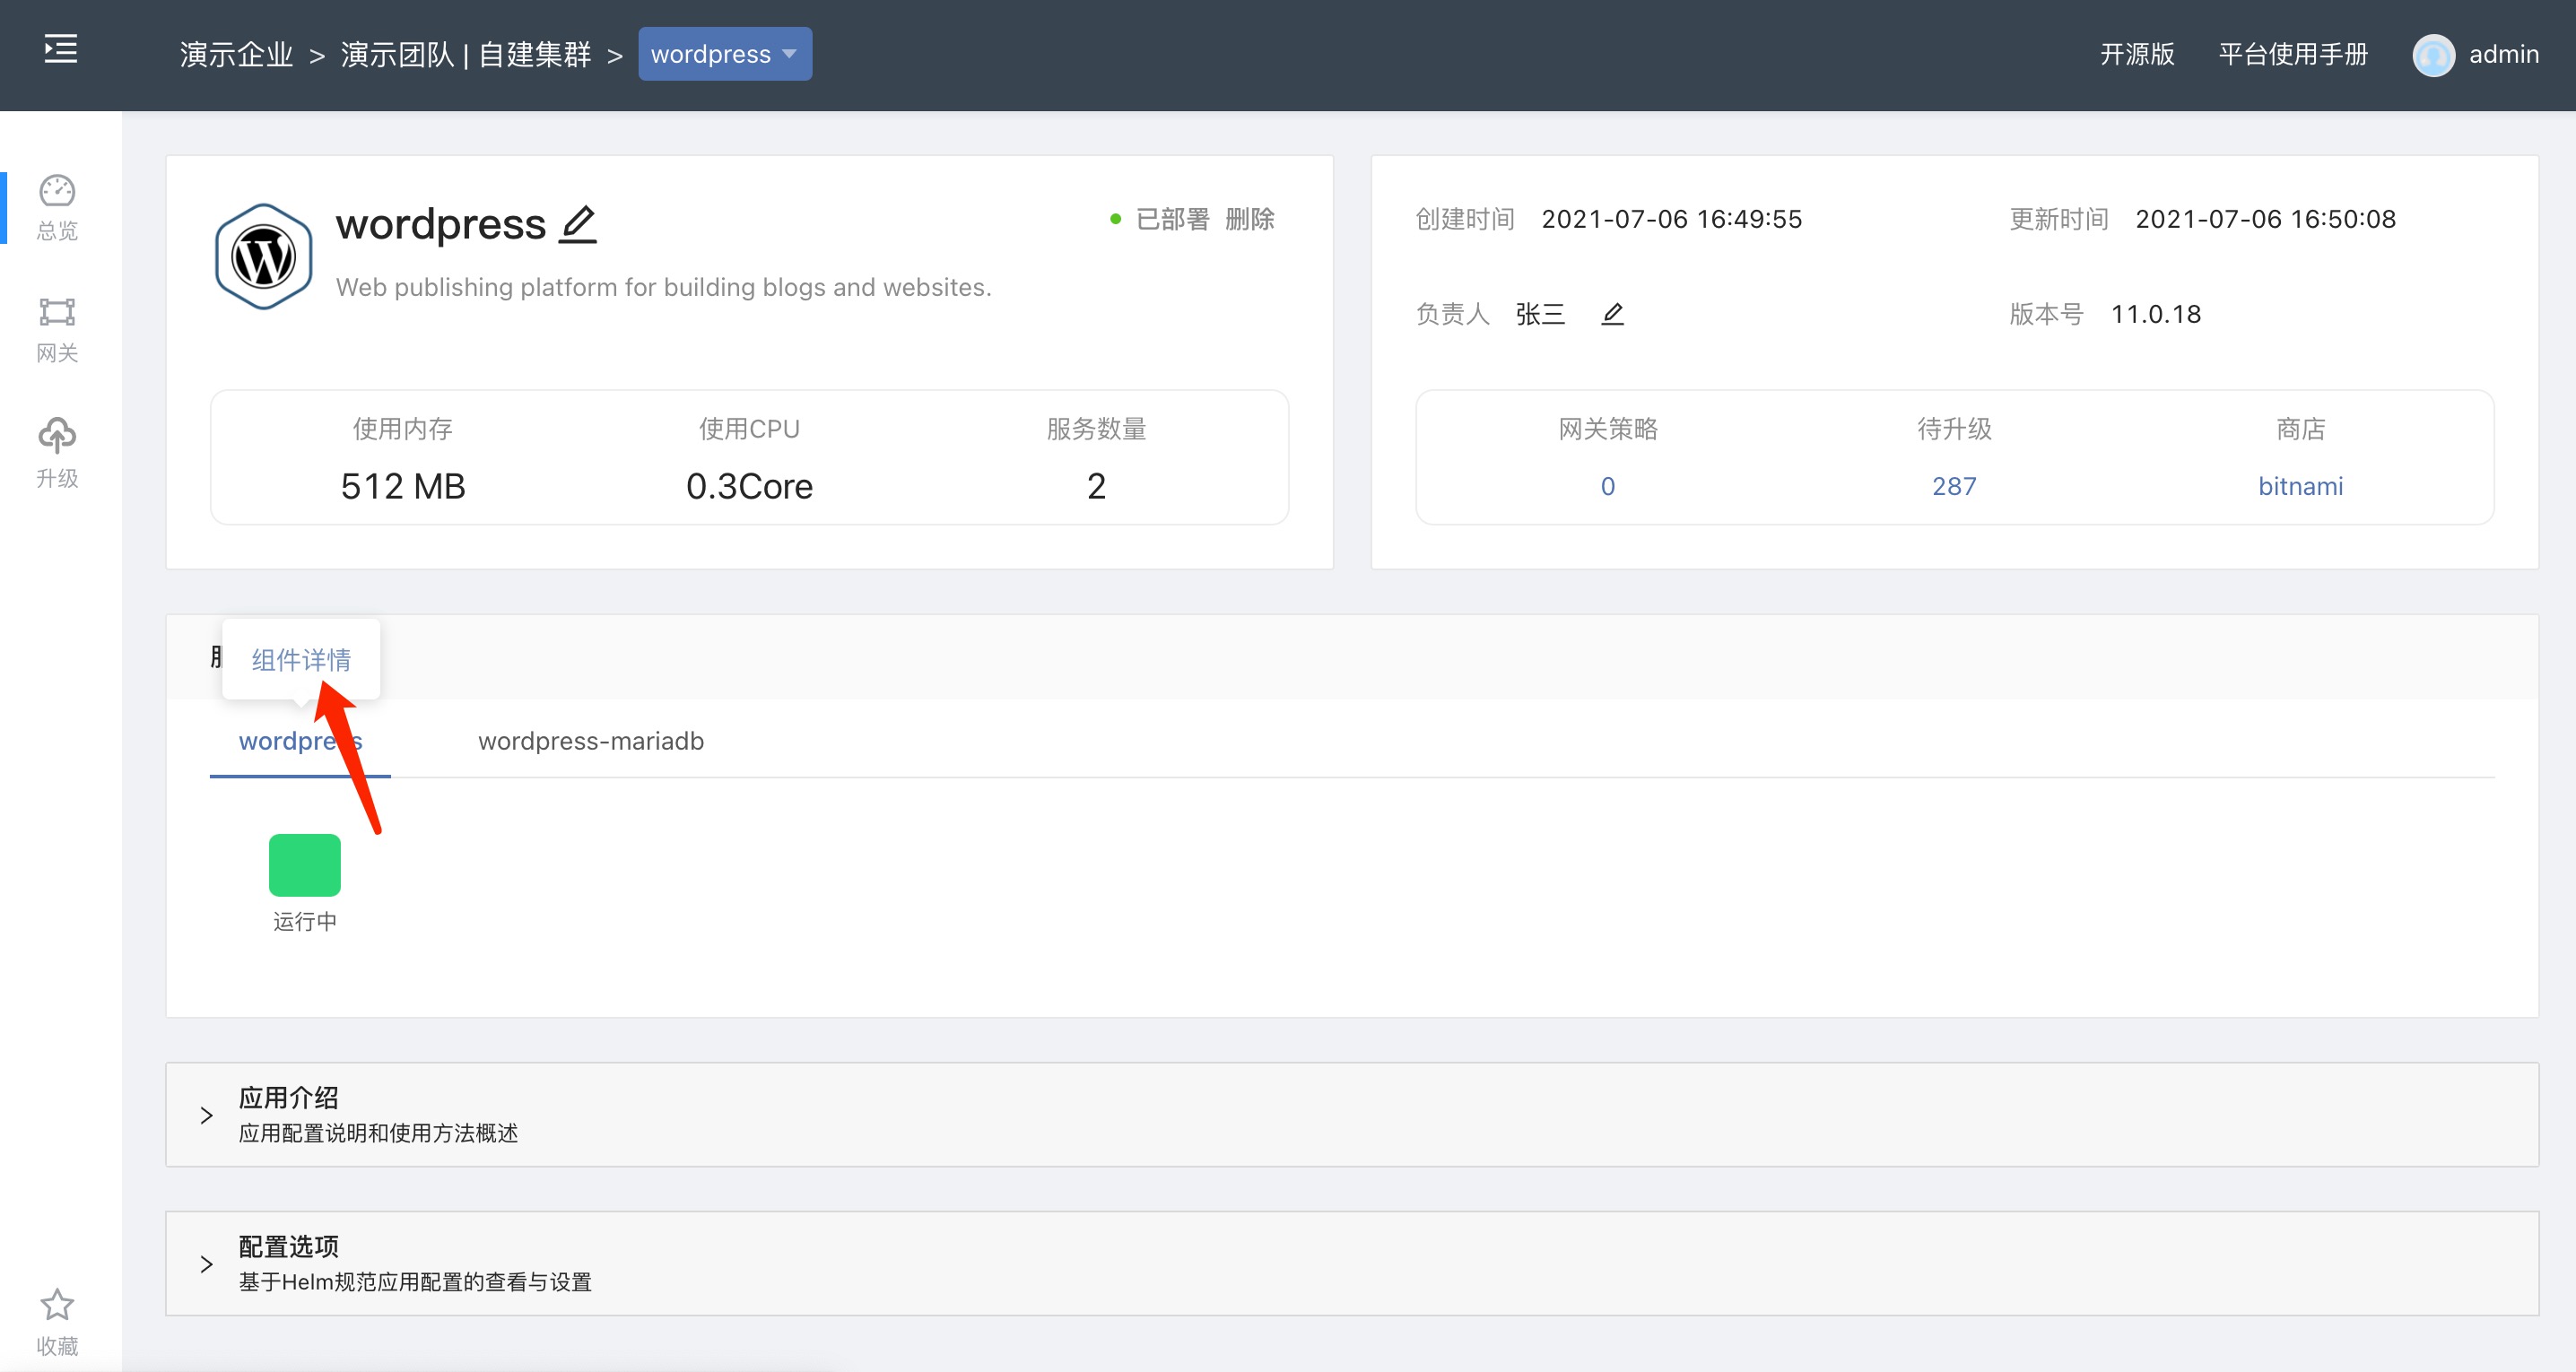
After the application is installed, the platform will automatically create the component as a third-party component of type k8s ; in the application interface , service instance will display all components contained in the application, click the corresponding component name, click Component details You can enter the component network settings page, open external serviceson the port page, and access the application according to the generated access policy If you deploy middleware classes and services, open internal services here. can be used by other services in the platform.


Click on the domain name generated in access policy to access the Wordpress web page.